How to export your Evernote notes to Notion and other apps
Since January, long-time note-taking favorite Evernote was sold, layed off most of its staff, and relocated its operations from Silicon Valley to Europe. With its future in a murky place, it’s wise to have a backup plan.
Fortunately, exporting from Evernote is a relatively simple process. And double-fortunately, plenty of viable Evernote alternative feature the ability to import Evernote files.
Here’s a look at how the export process works, along with notes about which popular Evernote replacements handle the import process on their respective platforms.
The quick way
Among newer note-taking apps, Notion is a popular choice. The easiest way to get your Evernote notes and notebooks into it is to head over to Notion and open an account.
Step through the quick onboarding process. Once you’re at the Getting Started screen, click the three-dot button in the upper-right corner of the screen and choose Import. You’ll notice here that Notion has support for several note-taking services.
Click Evernote and you’ll be presented with a screen authorizing Notion to access your Evernote account. There’s a dropdown where you can choose how long Notion can access Evernote; choose whichever length you’re comfortable with, though you’ll probably only need a day.
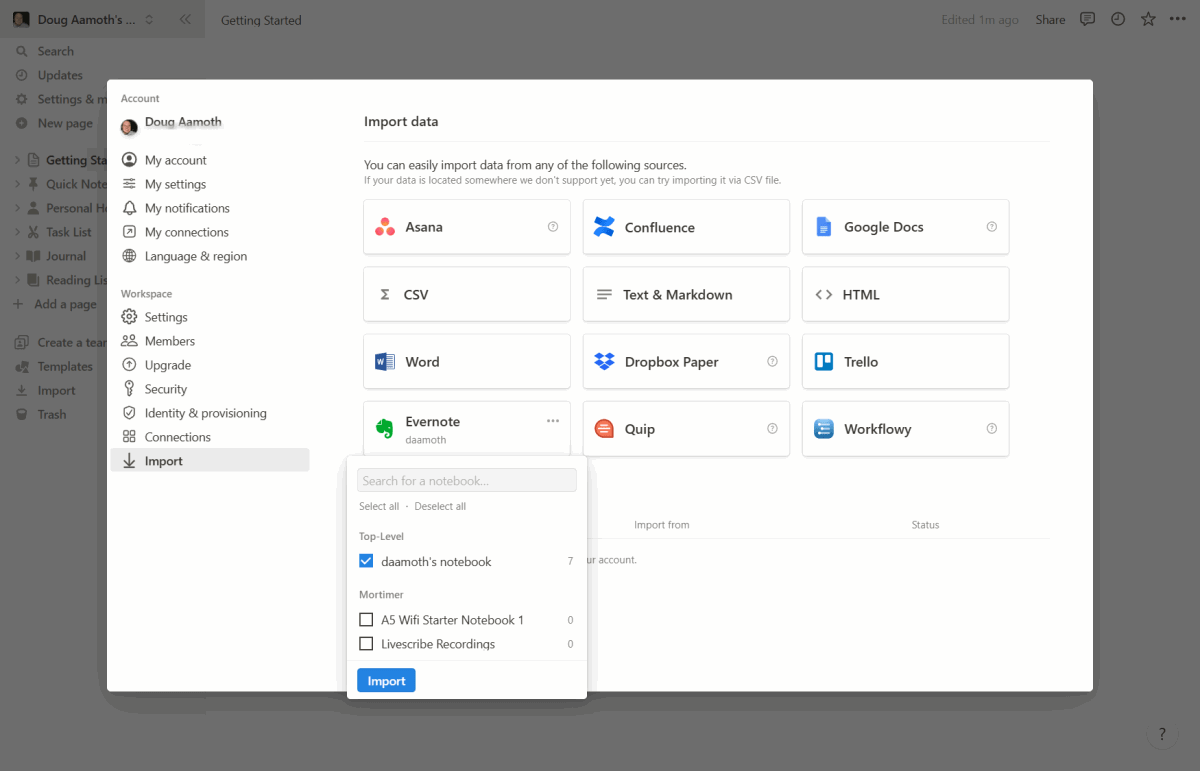
The Notion interface will compute for a bit and, once complete, click Evernote and you’ll see a drop-down containing your notebooks.
Select the notebook you want to import and click the Import button. If you’re importing a lot of notebooks, there’s a progress indicator at the bottom of the import interface showing how long it’ll take.
Once your notebooks have been imported, you’ll find them in the left-hand column of the Notion interface.
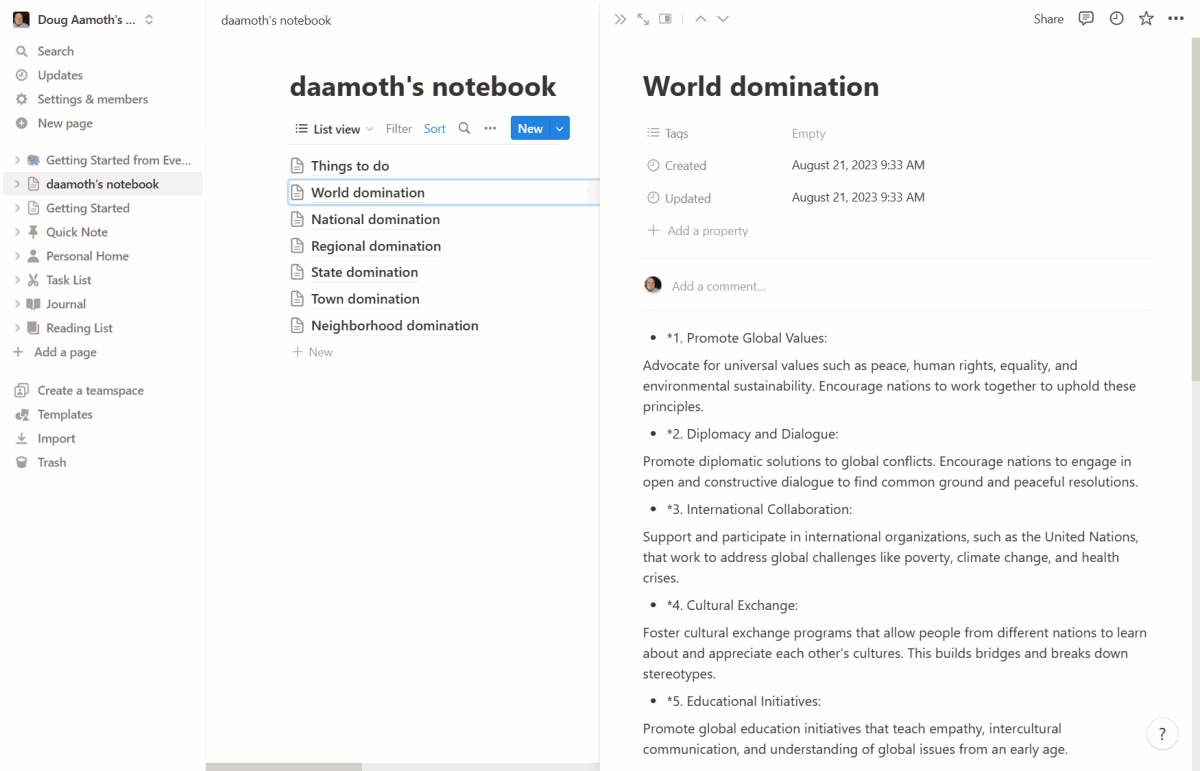
That’s it: You’re done. If you’d like to export your Evernote notebooks for backup purposes or for possible use with other note-taking apps—note that not all apps feature slick Evernote import features—read on.
Manually exporting from Evernote
First things first: You’ll need the Evernote desktop app for Mac or Windows to export your notes. Once you’ve downloaded and installed it, sign in.
Export notes one by one. To only export specific notes, open the Notes section and in the Notes column, right-click the note you’d like to export.
Now, from here, you have the option to export your note as an “ENEX” files—which is Evernote’s file standard—or as a single HTML web page, which is a more universal standard but not as easy to import into other apps.
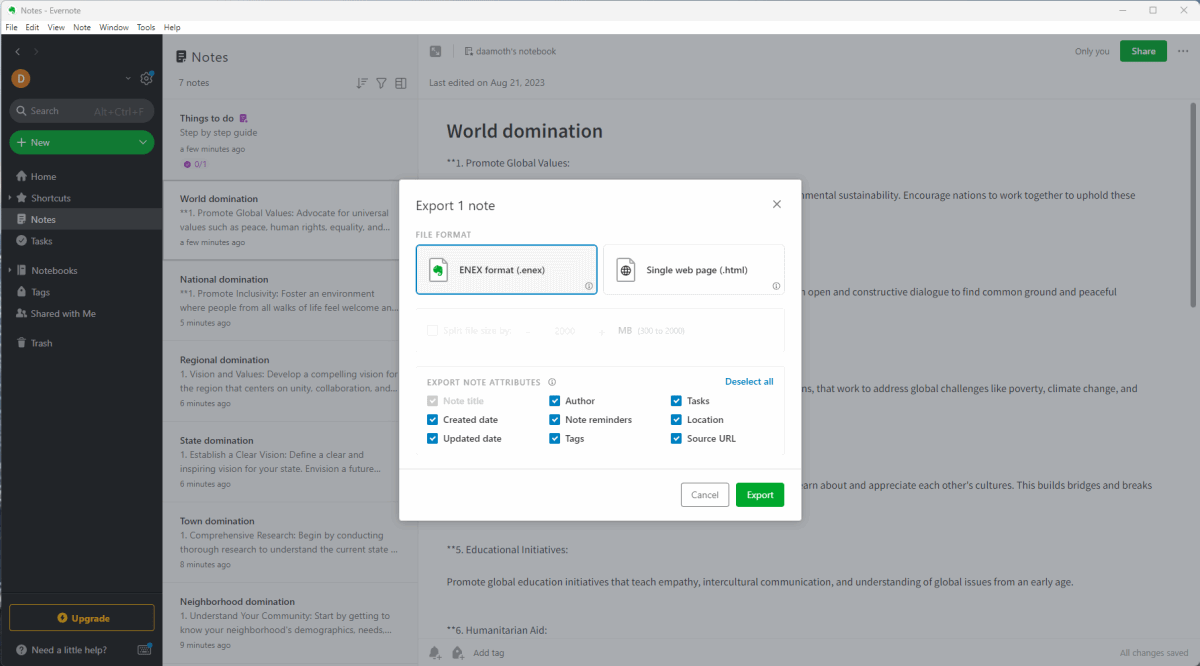
Choose ENEX and hit the Export button. You’ll be asked where to save the file, so save it somewhere that’s easily accessible for future import.
Bulk export entire notebooks. If you’ve got too many notes to export one by one, you can export entire notebooks instead.
To do so, click Notebooks in the left-hand column, then right-click on the notebook you’d like to export and choose the “Export notebook…” option.
Again, you’ll have the choice between exporting to ENEX, to an HTML file, and now you’ll have a new “Multiple web pages (.html)” option.
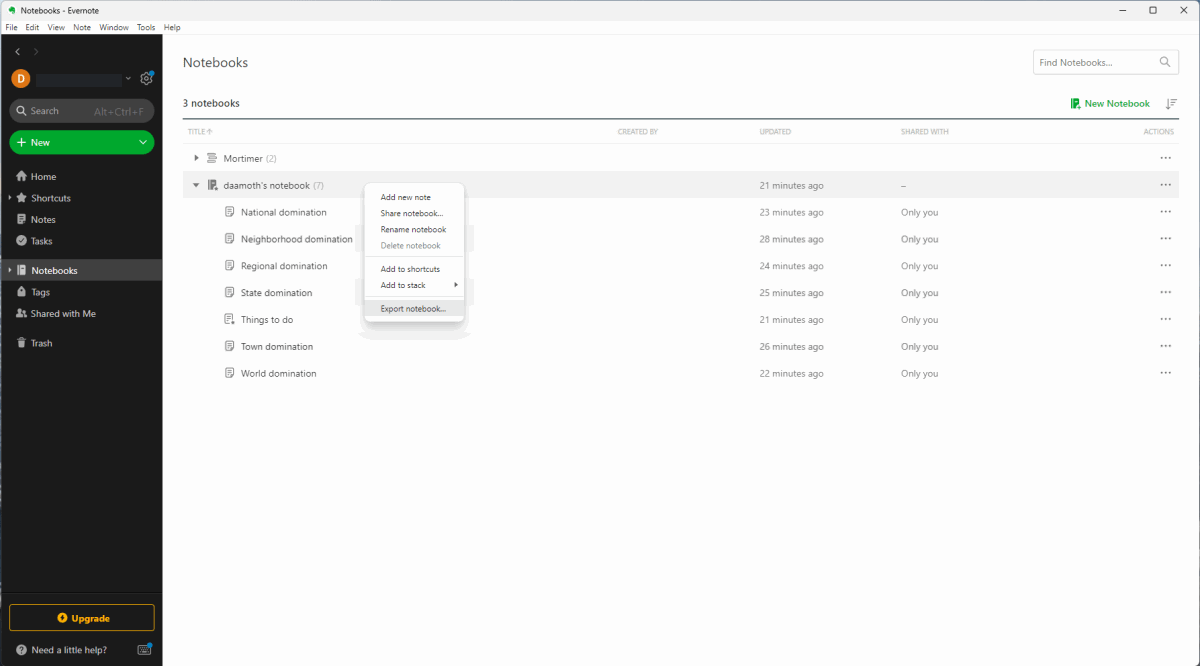
Choose ENEX here, and you’ll have a nice, tidy file of all the notes in the notebook you exported.
What about HTML exports? If you don’t really care to import your Evernote notes and notebooks to another note-taking app but just want a copy for future reference, choose the HTML option in either of the above two steps.
When exporting entire notebooks, the “Multiple web pages (.html)” option recreates each note as its own HTML file and contains a handy “Evernote_index.html” page that lets you navigate through them.
Importing to other note-taking apps
Now, it’s important to note that not all note-taking apps feature simple Evernote importing features. But here’s a shortlist of the some of the ones that do, without relying on third-party integration apps, plus links to instructions for how to ingest the ENEX files you exported.
(54)

