Download iTunes for Windows 10 – How To Install And Use iTunes on PC
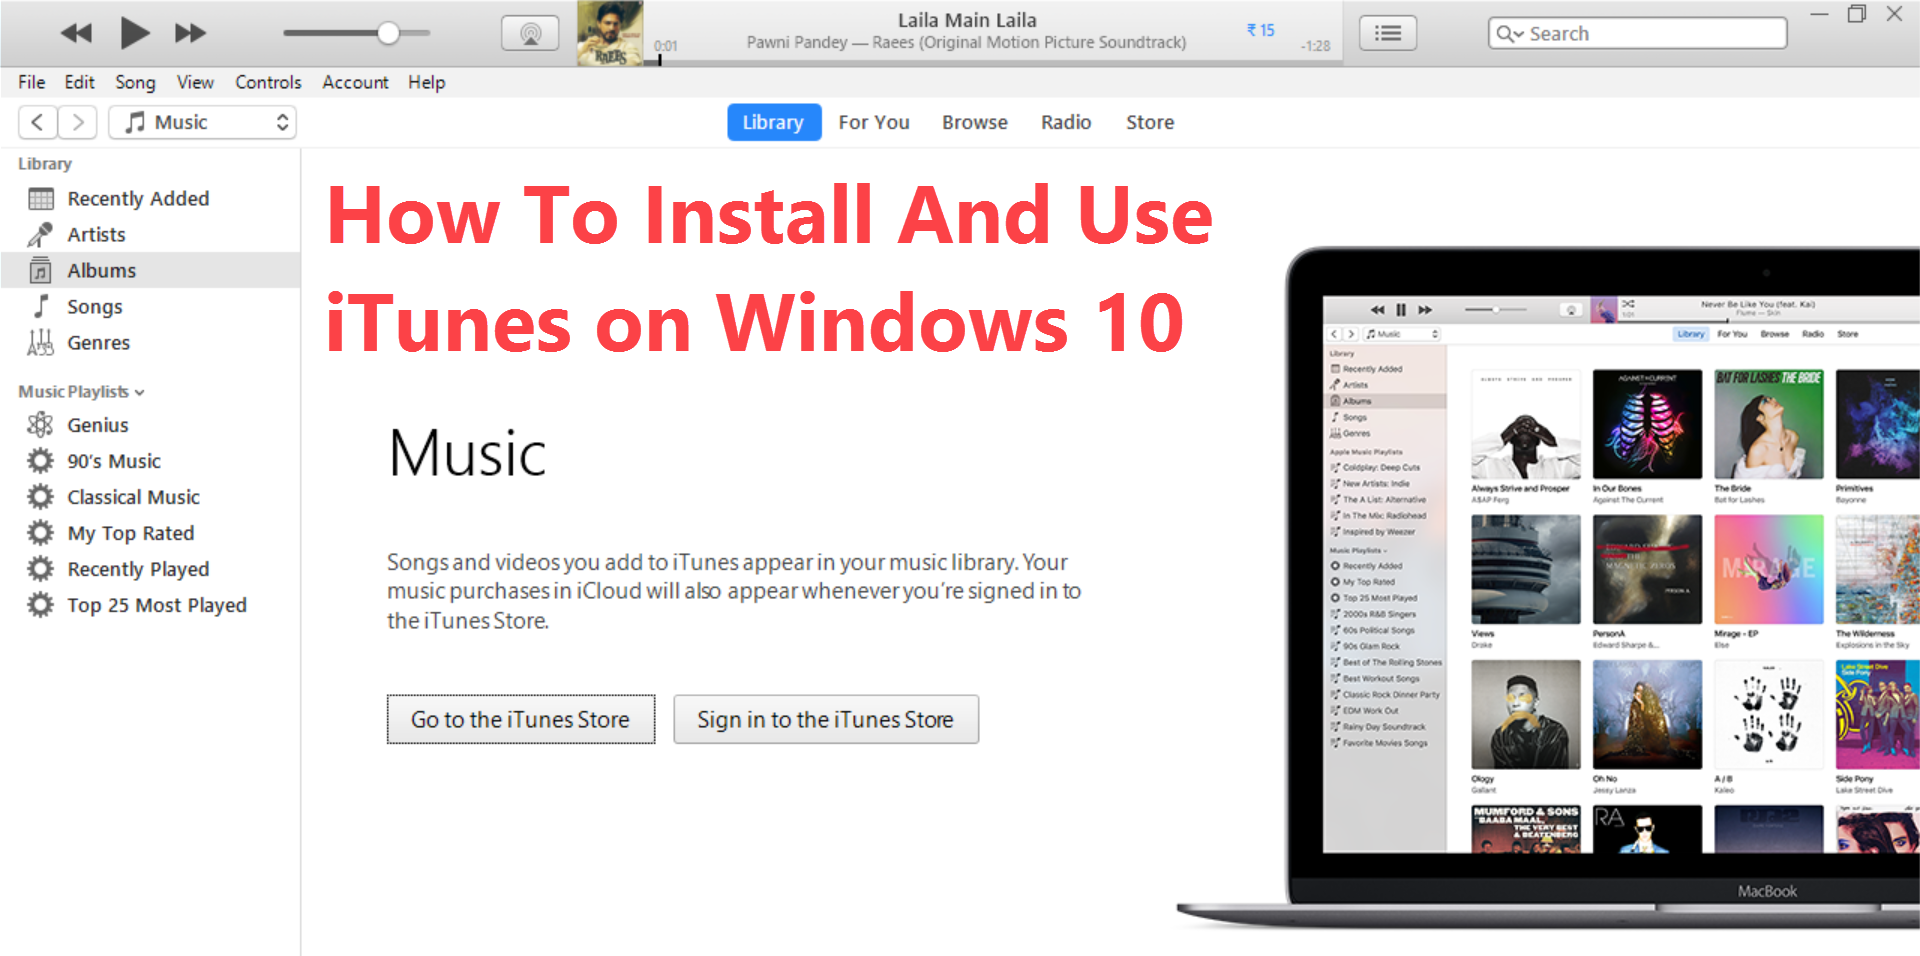
Planning to download iTunes for Windows 10? Well, you are at right place. We will cover all about the iTunes for Windows 10 including downloading, installing, creating Apple ID, authorising iTunes, and more. But, before we start with the subject topic, let’s go through a little introduction of iTunes.
iTunes Introduction
For every Apple user out there, one of the biggest issues is to synchronise and manage their media library. But Apple Inc. already has a great solution for this in the form of the mighty iTunes. You just need to install and synchronise iTunes on your PC and voila! the problem will be solved. Apple has already added a number of new contents like TV shows, movies, ringtones, etc. to the iTunes transforming it into a real bundle of joy.
Earlier, Apple didn’t use to pay much heed to the Windows users and hence the earlier versions of iTunes for Windows often suffered from many lacunas. There were many reported issues of malfunctioning of iTunes on the Windows 10. However, even Apple now acknowledges the vast coverage and customer base of Windows and the same has been taken care of by Apple in the latest issue of the coveted software. Now you just need to download iTunes for Windows 10 and all your music, photos, videos, and all other multimedia files will be secure on your personal computer.
Before getting started, make sure you have a decent internet connection and you are a man of patience because getting iTunes for Windows 10 isn’t a pretty easy task and it takes some time. But trust me after going through this article you will be easily able to download and install iTunes for Windows 10 without any troubles. So follow the steps closely.
Download iTunes for Windows 10
Follow the below step-by-step guide to download iTunes on PC.
STEP 1: Visit apple.com/itunes/download from your Computer’s browser.

STEP 2: Check whether your PC is compatible with the requirements elaborated on the page opened. You must have at least 512 MB RAM and a 1GHz Intel or AMD processor.
(Please note that with the current version, you can only download iTunes for Windows 10 64-bit)
STEP 3: Now hit the ‘Download Now’ button.
STEP 4: Save the application at your desired location in your PC.
How to Install iTunes on Windows 10
Now that you are done with downloading iTunes for PC (Windows 10 64-bit), you need to install the program:
STEP 1: Right-click on the iTunes setup file you have just downloaded.
STEP 2: Click on the Run as administrator option.
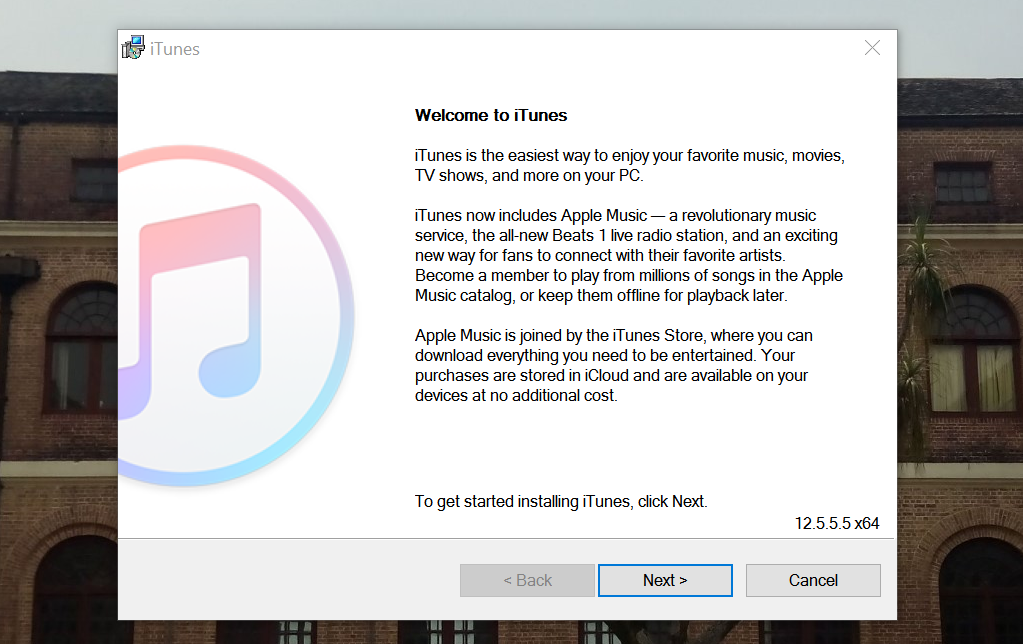
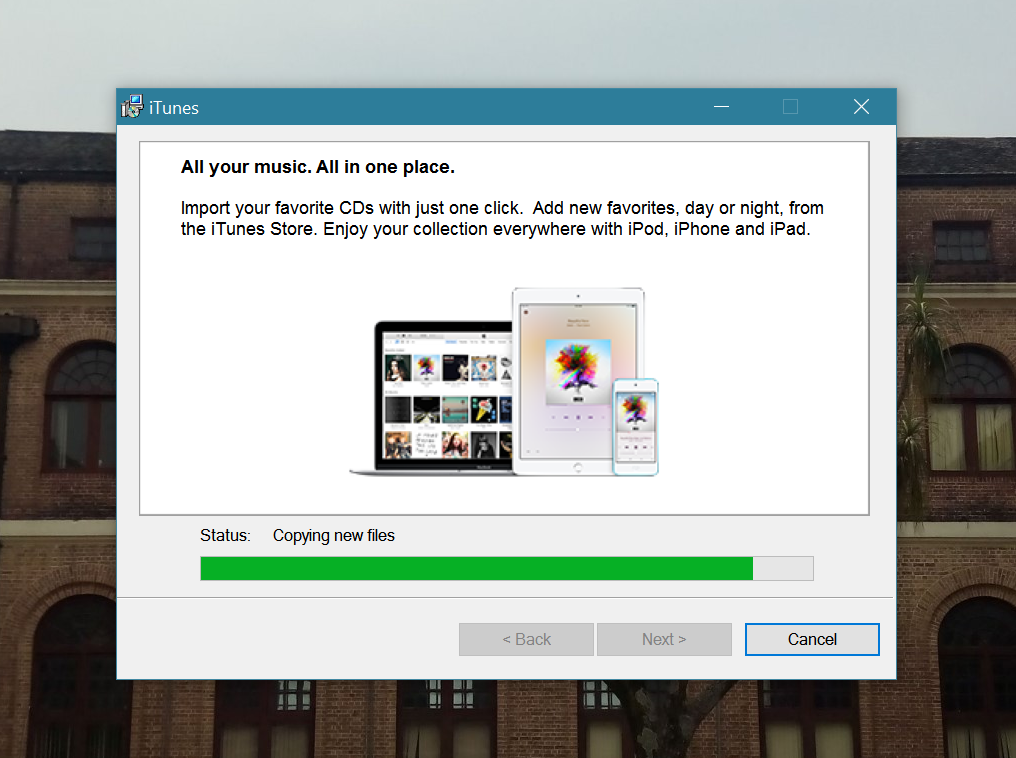
STEP 3: Go through onscreen instructions and click on the ‘Install’ button.
Also check: Download Windows 10 ISO
STEP 4: Click ‘Finish’ to complete the installation of iTunes on your Windows 10 PC.
How to Create An Apple ID on Windows 10 PC
To download contents from iTunes you have to sign into iTunes using a valid Apple login ID. The same ID that you have on your iPhone or iPad will do just fine but if you don’t happen to have one, it’s quite easy to create an iTunes account from your Windows 10 laptop or PC. Follow these steps to create an iTunes account on your PC.
Error Fix: This Copy of Windows Is Not Genuine
STEP 1: Launch iTunes on your PC.
STEP 2: Click ‘Account’ icon on the top-left part of the iTunes window.
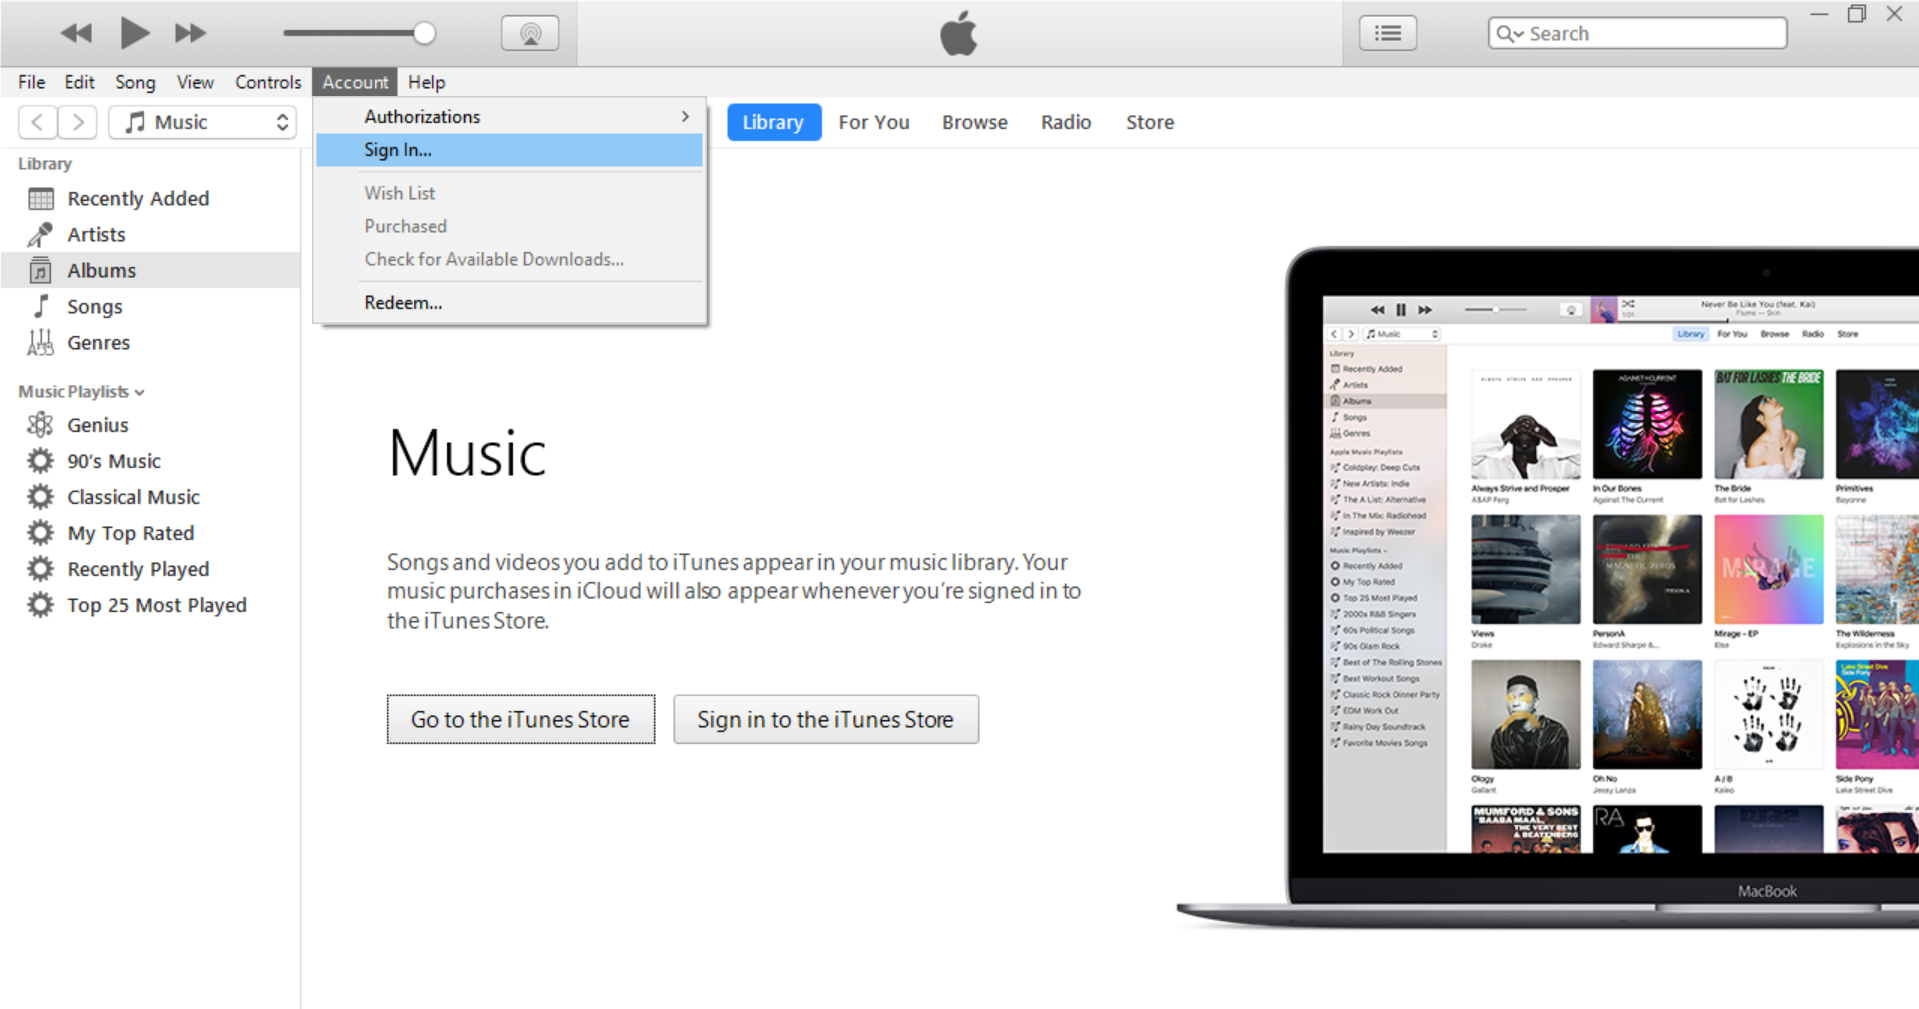
STEP 3: Tap on the ‘Create new Apple ID’ option. However, if you happen to have an iTunes account you can avoid next steps and sign-in directly.
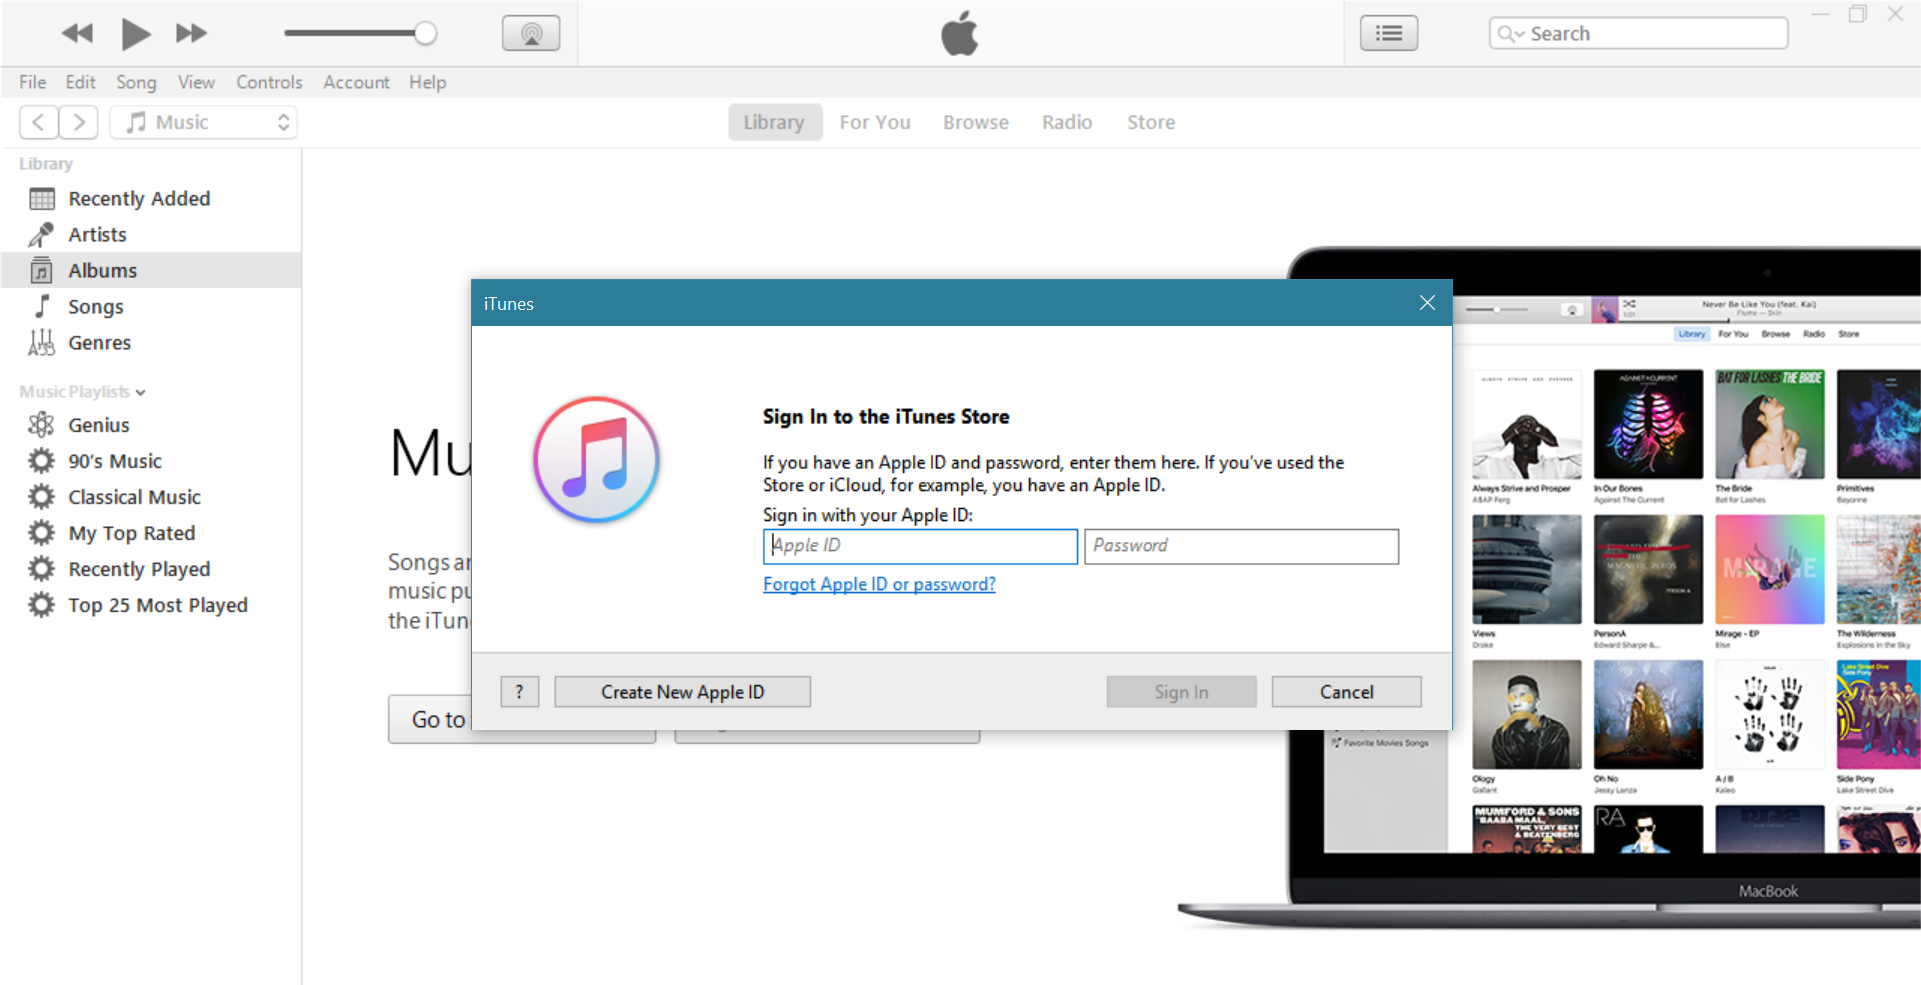
STEP 4: Tick the checkbox to consent to the terms and conditions and click on the ‘Agree’ button.
STEP 5: Fill in the asked details (a valid email ID and a strong password).
STEP 6: Select a payment mechanism for future transactions.
STEP 7: Fill in other required personal details.
STEP 8: Now finally click on to the ‘Create Apple ID’ button.
STEP 9: A verification email will be sent to your email id, open it and click on the link to verify.
Error Fix: Windows cannot be installed to this disk
How to Authorise iTunes for Windows 10
Now that your iTunes account is all set, you need to authorise iTunes for Windows 10 PC that you use. Authorising a PC gives iTunes access to all your contents. A user can have a maximum of 5 devices authorised to its name. Here is how you can authorise iTunes for Windows 10 64-bit PC:
STEP 1: Launch iTunes on your PC.
STEP 2: Click on the ‘Account’ icon on the upper-left corner of the Window.
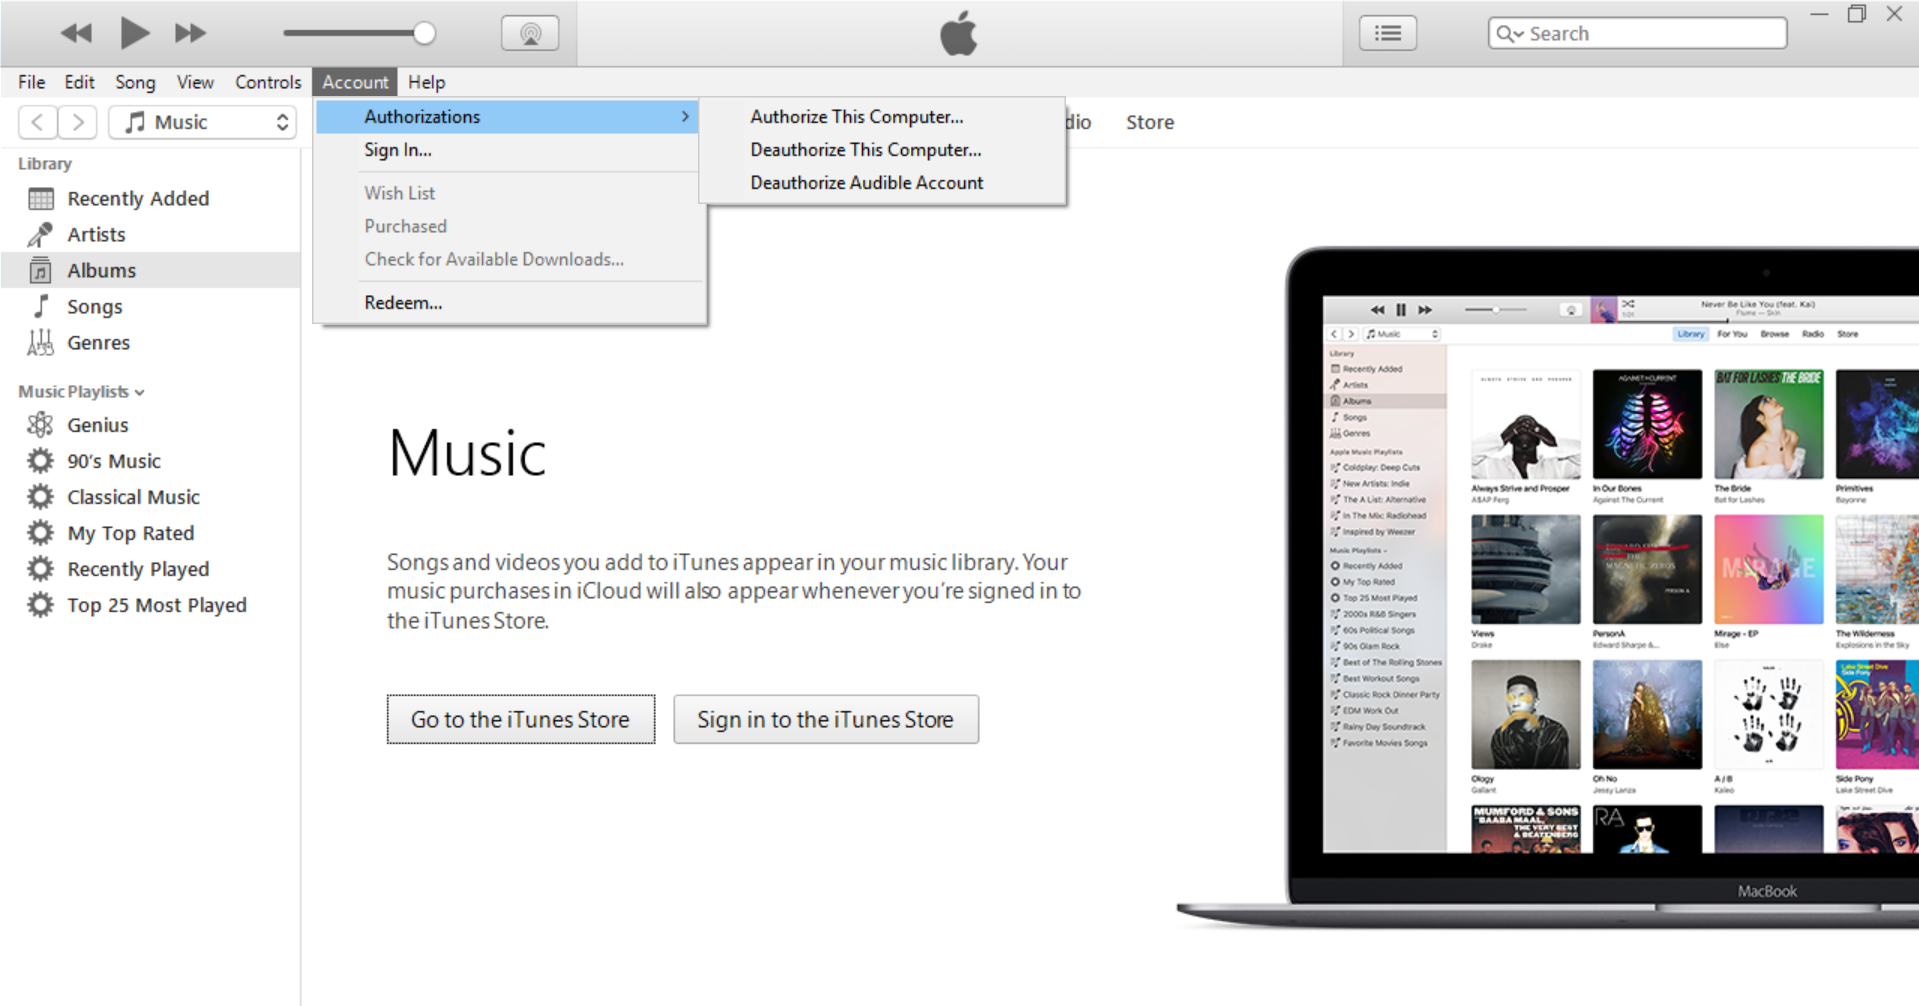
STEP 3: Click on the ‘Authorizations’ option.
STEP 4: Now enter your password to finish the authorization process.
That’s it, we are done with setting up iTunes for Windows 10, Now it’s time we learn how to get started with iTunes on your Windows 10 running PC.
How to Start Using iTunes on Windows 10
First, let’s start with importing media library to iTunes on your PC.
STEP 1: Start iTunes on your PC.
STEP 2: Click on the ‘File’ button.
STEP 3: Now tap ‘Add Folder to Library’.
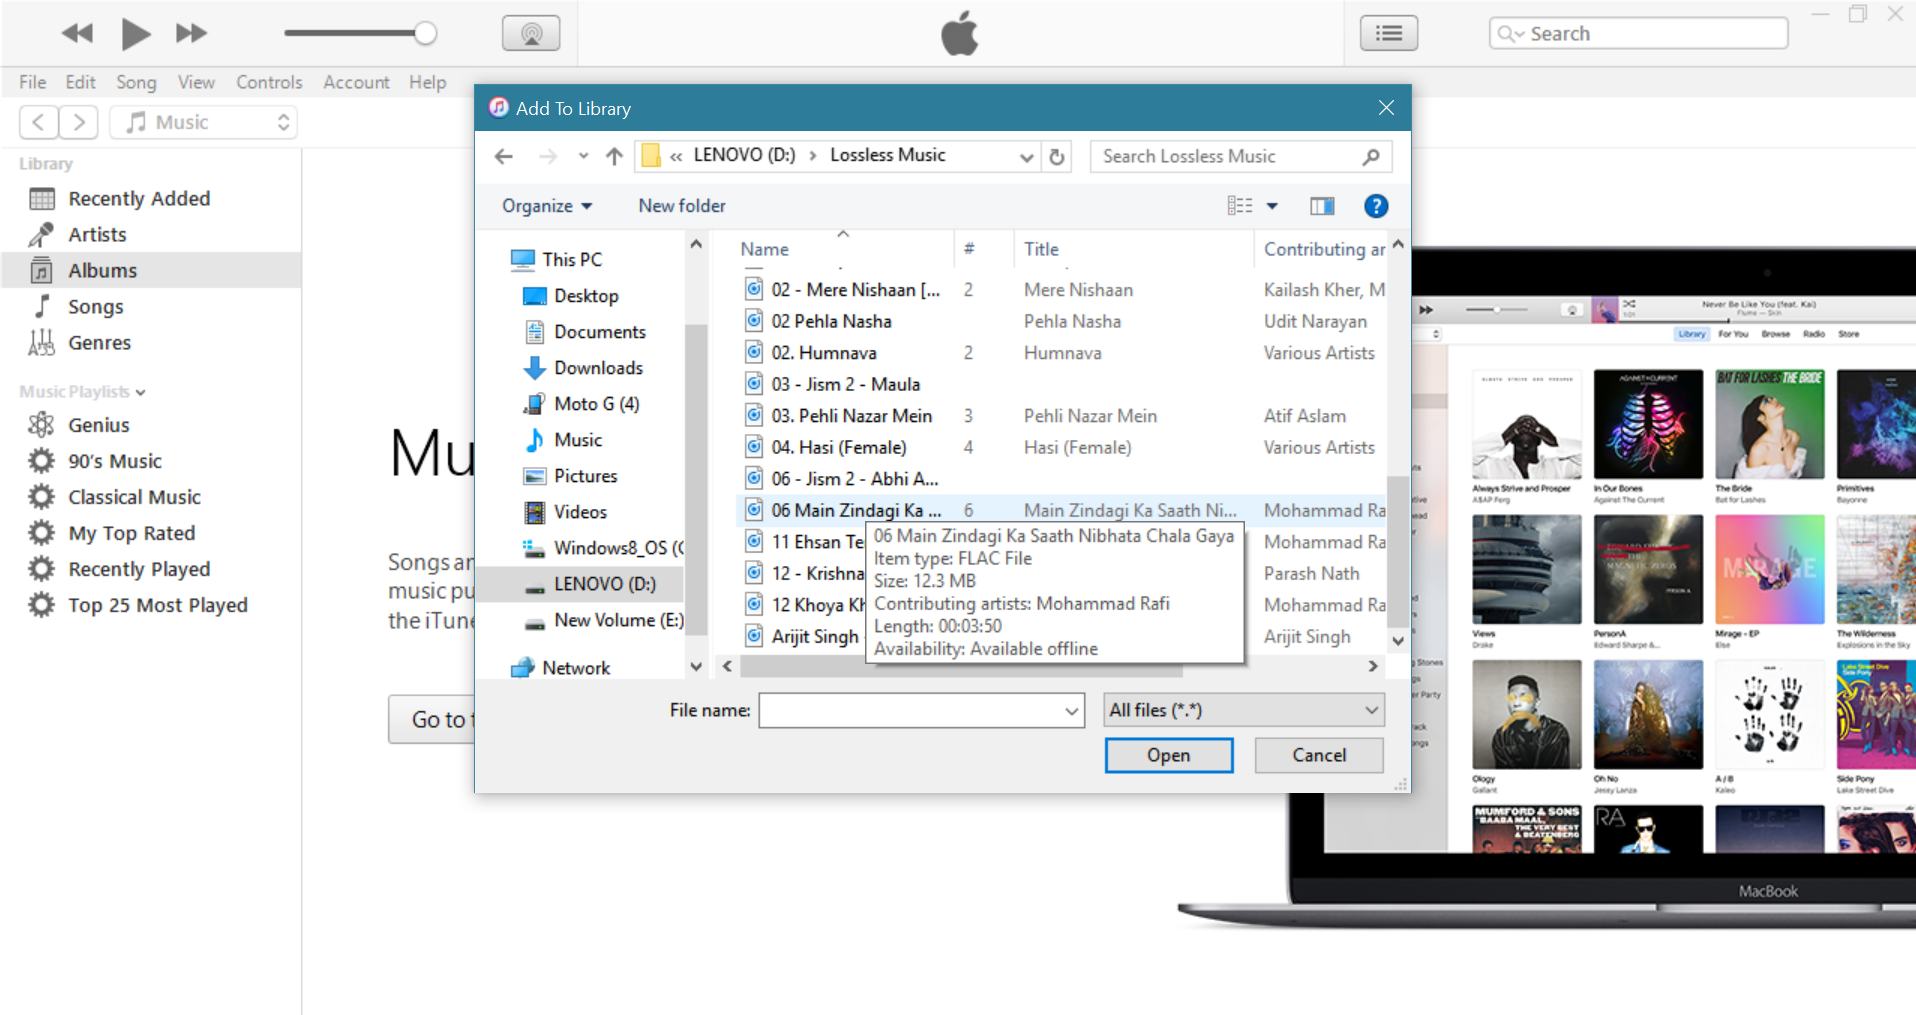
STEP 4: Select the file or folder you want to import.
STEP 5: Repeat the process until all your desired files are imported.
iTunes lets you buy music, videos, and all other types of multimedia content on any platform. Enough said, now get ready for your first purchase through iTunes.
Error Fix: Windows was unable to complete the format
How to Buy Media Items through iTunes on Windows 10
Here’s how you can buy media items through iTunes for Windows 10 64-bit PC.
STEP 1: Launch iTunes.
STEP 2: Open ‘Store’ from the menu bar on the top side of the window.
STEP 3: Browse through the items you want to buy.
STEP 4: Click on the price button next to the item you want to purchase.

STEP 5: At the checkout, you need to enter your password and then click on the ‘Buy’ button that appears next.
STEP 6: Your download will start now. You can retrieve the same from the ‘Library’ later.
Now you are all set to use the iTunes on Windows 10 PC. You can now easily manage your iPhone’s and iPad’s media library from your Windows 10 PC in just a few clicks. You can easily add or delete music, videos, movies, TV Shows to your Apple devices from your Windows PC.
The post Download iTunes for Windows 10 – How To Install And Use iTunes on PC appeared first on MobiPicker.
(72)


