[Fix] Keyboard Not Working in Windows 10
Windows 10 is one of the greatest operating systems from Microsoft, but it hasn’t been smooth for everyone from the beginning. Many users are reporting that their keyboard is not working in Windows 10. If your are one of them and your keyboard stops working randomly, then you are at the right place. In this guide, we will help you fix this problem using different methods.
Just like I said, Windows 10 is indeed a wonderful operating system, but there are still many bugs hidden inside it. Microsoft is releasing patches and fixes in every few days after the release of Windows 10. But, they are still not able to get it rid of every problem. We have received many complaints from Windows 10 users that their keyboard suddenly stops working. Some have reported that the keyboard behaves weirdly after their Windows 10 computer wakes up from sleep. And this error is not specifically occurring on only desktops or laptops.
This is just another one from the long list of Windows 10 bugs. Sometimes a few keys don’t work and sometimes the whole keyboard stops working. There are few ways to fix this issue.
How to Fix Keyboard Problems in Windows 10
If your keyboard is not working in Windows 10, follow the methods below.
1. Update your BIOS
The first method which could fix the keyboard issue is updating your BIOS, which is an acronym for Basic Input / Output System. Its work is to manage all the devices connected to the computer, and one of those devices is the keyboard. If BIOS is not up to date, then it can cause problems with any connected device. Therefore, if BIOS is not working properly or is outdated, then it could be the reason why your keyboard is is not working. Here are the steps to update BIOS.
Check Also: Start Menu not working in Windows 10
STEP 1. To begin this process, first, we need to find the current BIOS version in your system. Go to the Cortana search bar or click on Windows logo. Search “System Information” and open it from results.
![[Fix] Keyboard Not Working in Windows 10 | DeviceDaily.com [Fix] Keyboard Not Working in Windows 10 | DeviceDaily.com](https://www.devicedaily.com/wp-content/uploads/2017/11/001-Fix-Keyboard-Not-Working-in-Windows-10.png)
STEP 2. The last step will open System Information window. Here you can find the BIOS version. Note it down.
![[Fix] Keyboard Not Working in Windows 10 | DeviceDaily.com [Fix] Keyboard Not Working in Windows 10 | DeviceDaily.com](https://www.devicedaily.com/wp-content/uploads/2017/11/002-Fix-Keyboard-Not-Working-in-Windows-10.png)
STEP 3. Visit your computers’ manufacturer’s website and find the accurate BIOS update. Go to your product’s download page and download the BIOS update, specific to your computers’ BIOS version.
STEP 4. Open the downloaded update. It will reboot your system and then it will open the BIOS update page. Finish the update.
This procedure may vary a little from one computer to another.
2. Uninstall Synaptics Driver
Windows 10 is reported to have problems with old drivers. Synaptics is one of them and to fix the issue, you need to uninstall Synaptics drivers.
STEP 1. Right-click on the Start button, and select Device Manager.
![[Fix] Keyboard Not Working in Windows 10 | DeviceDaily.com [Fix] Keyboard Not Working in Windows 10 | DeviceDaily.com](https://www.devicedaily.com/wp-content/uploads/2017/11/005-Fix-Keyboard-Not-Working-in-Windows-10.png)
STEP 2. Locate Synaptics driver in the Device Manager, right click it, and select Uninstall.
![[Fix] Keyboard Not Working in Windows 10 | DeviceDaily.com [Fix] Keyboard Not Working in Windows 10 | DeviceDaily.com](https://www.devicedaily.com/wp-content/uploads/2017/11/004-Fix-Keyboard-Not-Working-in-Windows-10.png)
STEP 3. A confirmation dialog box will open up. Select OK.
This will uninstall the Synaptics driver from your computer. Now, restart your Windows 10 PC. Now, your computer will automatically install the default driver for Synaptics. This should solve the Keyboard issues on Windows 10. If it doesn’t, then follow the next method.
3. Reinstall Keyboard and Trackpad Drivers
Usually, this problem could be happening due to faulty or corrupted keyboard and/or trackpad drivers. To fix this, you will have to reinstall these drivers, which can be done by following these steps.
STEP 1. Right-click on the Start menu and select Device Manager.
![[Fix] Keyboard Not Working in Windows 10 | DeviceDaily.com [Fix] Keyboard Not Working in Windows 10 | DeviceDaily.com](https://www.devicedaily.com/wp-content/uploads/2017/11/005-Fix-Keyboard-Not-Working-in-Windows-10.png)
STEP 2. Expand Keyboards and right click on your keyboard’s name. Select Uninstall. Click OK when prompted for confirmation.
![[Fix] Keyboard Not Working in Windows 10 | DeviceDaily.com [Fix] Keyboard Not Working in Windows 10 | DeviceDaily.com](https://www.devicedaily.com/wp-content/uploads/2017/11/006-Fix-Keyboard-Not-Working-in-Windows-10.png)
STEP 3. Expand Mice and other pointing devices. Locate your trackpad and right click on it. Select Uninstall. Click OK when prompted for confirmation.
![[Fix] Keyboard Not Working in Windows 10 | DeviceDaily.com [Fix] Keyboard Not Working in Windows 10 | DeviceDaily.com](https://www.devicedaily.com/wp-content/uploads/2017/11/007-Fix-Keyboard-Not-Working-in-Windows-10.png)
STEP 4. Restart your computer.
After the restart, your computer will install the default keyboard and trackpad drivers automatically. Your keyboard should work now. If you are still facing the problem, try out the next method.
4. Update Keyboard Drivers
If reinstalling the default drivers for keyboard and touchpad didn’t work, then you should update the keyboard drivers. Usually, this can be done from the drivers CD which you got along with your computer. Just access the CD and install your keyboard drivers. If you don’t have the CD or this didn’t work, then follow these steps.
STEP 1. Go to your computers’ manufacturer’s website.
STEP 2. Locate your product by searching it and go to its download page.
STEP 3. Find the driver for your keyboard, download it locally on your PC. Now, you can install it as you do any other driver.
Note: You can download the driver on some other computer and then transfer them to yours if the keyboard wasn’t working at all.
After updating the driver, restart your computer. If still the keyboard is not working properly, then follow the next method.
5. Turn OFF Filter Keys
Filter keys are turned ON by default on our computers. For those who are not aware, Filter keys is a feature which ignores repeated keystrokes. As it is turned ON, this could be causing problems. To turn it OFF, follow the steps.
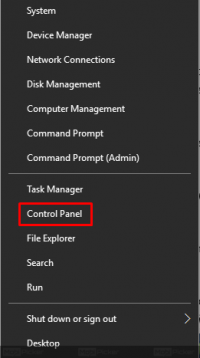
STEP 1. Right-click on the Start button. Select Control Panel.
![[Fix] Keyboard Not Working in Windows 10 | DeviceDaily.com [Fix] Keyboard Not Working in Windows 10 | DeviceDaily.com](https://www.devicedaily.com/wp-content/uploads/2017/11/008-Fix-Keyboard-Not-Working-in-Windows-10.png)
STEP 2. On Control Panel, go to Ease of Access.
![[Fix] Keyboard Not Working in Windows 10 | DeviceDaily.com [Fix] Keyboard Not Working in Windows 10 | DeviceDaily.com](https://www.devicedaily.com/wp-content/uploads/2017/11/009-Fix-Keyboard-Not-Working-in-Windows-10.png)
STEP 3. On next page, select Ease of Access Center.
![[Fix] Keyboard Not Working in Windows 10 | DeviceDaily.com [Fix] Keyboard Not Working in Windows 10 | DeviceDaily.com](https://www.devicedaily.com/wp-content/uploads/2017/11/010-Fix-Keyboard-Not-Working-in-Windows-10.png)
STEP 4. Scroll down and open “Make the Keyboard easier to use”.
![[Fix] Keyboard Not Working in Windows 10 | DeviceDaily.com [Fix] Keyboard Not Working in Windows 10 | DeviceDaily.com](https://www.devicedaily.com/wp-content/uploads/2017/11/011-Fix-Keyboard-Not-Working-in-Windows-10.png)
STEP 5. Now, on this page, look for “Turn on Filter Keys”. If the box in front of it is marked, then unmark it and click OK.
![[Fix] Keyboard Not Working in Windows 10 | DeviceDaily.com [Fix] Keyboard Not Working in Windows 10 | DeviceDaily.com](https://www.devicedaily.com/wp-content/uploads/2017/11/012-Fix-Keyboard-Not-Working-in-Windows-10.png)
Check if this has solved the problem. If not, follow the next method.
6. Install Windows Updates
Microsoft is constantly releasing updates in every few days. They are patches, fixes and updates to different bugs and features. It is recommended to always download and install Windows updates as soon as they are released. Usually, automatic Windows update is ON. If it’s not, then search for Windows Update in Cortana, open Windows Update, and turn it on. You can also Check for Updates on the same window and install the updates if it is available.
7. Use an External Keyboard
If the error is still not gone, then probably this can only be solved by a Windows patch. As I mentioned earlier, Microsoft releases patches every now and then. Keep installing all of them and just wait for the right patch which fixes this issue. Till then, use a USB keyboard. This is not a solution but just a temporary fix until Microsoft releases the patch for your computer’s keyboard error.
Conclusion
Windows 10 has many bugs and Microsoft is still working to fix every issue. If you have followed every method, and still the Keyboard is not working in Windows 10, then probably it can only be fixed by Microsoft. We hope that’s not the case with you, and you were able to fix the problem with our tutorial. If any other method worked for you, don’t forget to shoot it in comments.
Check Also: Taskbar not working in Windows 10
The post [Fix] Keyboard Not Working in Windows 10 appeared first on MobiPicker.
(104)


