[FIX] ‘System and Compressed Memory’ High Disk Usage in Windows 10
Quite recently, an insurmountable search on the Internet regarding Windows 10 system fixes has increased tremendously. Much of it has been about Windows 10 system and compressed memory disk usage. But what is system and compressed memory and how can you fix this problem? Let’s find out in this tutorial.
Contents
- 3.1 1. Repair Corrupted System Files
- 3.2 2. Turn On ‘Automatically Manage Paging File Size for All Drives’
- 3.3 3. Disable RunFullMemoryDiagnosticEntry to fix System and Compressed Memory High Usage
- 3.4 4. Disable Superfetch to Fix System and Compressed Memory High Disk Usage
- 3.5 5. End the Speech Runtime Executable Process
- 3.6 6. Adjust Visual Effects for Best Performance
![[FIX] ‘System and Compressed Memory’ High Disk Usage in Windows 10 | DeviceDaily.com [FIX] ‘System and Compressed Memory’ High Disk Usage in Windows 10 | DeviceDaily.com](https://www.devicedaily.com/wp-content/uploads/2017/10/001-FIX-System-and-Compressed-Memory-High-Disk-Usage-in-Windows-10.jpg)
What is System and Compressed Memory?
It is a process that controls and monitors various functions which are related to the system and Random Access Memory associated operations.
Generally speaking, a system and compressed memory only utilize a small percentage of your device’s memory. However, this can pique to a 100% disk usage when your PC is running at full force and running operations that require a lot of juice. As a result, users experience a slowed-down Windows, which causes stress, anxiety, and a lot of anger, none of which are good for you.
System and Compressed Memory High Usage
Although this anomaly was reported in 2013, it wasn’t until Windows 10 upgrade that people actually felt the burden of a system and compressed memory disk usage.
This is not to say that you have not entirely noticed whenever one of your disk drives (mostly C: Drive), becomes full for absolutely no reason and you are left wondering “how the hell did that happen? I haven’t even installed anything!” As a response to this, you begin uninstalling anything that you might have installed in the most recent time, be it a PC game, lots of movies or a couple of heavy software.
Some of you might also think this is a bug and then upgrades Anti-Virus or Internet Security. But it’s none of that. It is just plain old Windows (or Windows 10, in this case).
What was it like in the old Windows versions?
In the older versions of Windows, space was a limitation, unlike today where memory spaces have vastly increased. You can load up on multiple HDD, SDD, and other external Hard Drives starting at 1TB, going all the way up to 100TB. Moreover, none of these gadgets are even hard to assimilate.
There’s a feature within Windows, it is called a ‘Page file.’ When you used to uninstall heavy programs in the pre-Windows 10 versions, the system would offload some of the least used page files from your hard drive.
When your RAM is full, Windows automatically makes some room in it by taking away what you are not using at that moment. The more data you fetch, the more time-consuming this process becomes. Since it would have to read it from RAM and write them to disk, then read the new program from disk and load it into the freed up space of RAM.
This entire operation is quite slow and consumes a terrible amount of time. To the user, this might seem like the wait of a century!
In slower systems, crashes would occur quite a lot, along with system freeze! Today, these two problems have been mitigated with faster & larger RAMs and ROMs, and also, allowing the Windows to choose automatically how much size should it allocate to page files, but I will get to it later.
What’s it like now?
In the modern context, that is Windows 10 system and compressed memory high disk usage happens because, in addition to the process described above for the older versions, Windows 10 decreases the task of taking away unused page files and retains them in RAM. This service also has a fancy name, called ‘Method & Compressed Storage Service.’ This is put in Windows 10 to enhance the performance of your computer. Although you can change this default setting and set it to automatic, and let the system choose what is best for you.
How to Fix High Disk Usage by System and Compress Memory
Let’s now get to the fix. Here you will find a detailed set of instructions (with images) on ‘how to fix the system and compressed memory high disk usage on Windows 10?’
1. Repair Corrupted System Files
![[FIX] ‘System and Compressed Memory’ High Disk Usage in Windows 10 | DeviceDaily.com [FIX] ‘System and Compressed Memory’ High Disk Usage in Windows 10 | DeviceDaily.com](https://www.devicedaily.com/wp-content/uploads/2017/10/002-FIX-System-and-Compressed-Memory-High-Disk-Usage-in-Windows-10.png)
The first thing we will recommend you to check and fix the corrupt system files if any. You can do the task smoothly just with a click by using REIMAGE PLUS. Just download & install the software, and run it to check for corrupt and missing files. If found, this software will repair them automatically.
Once you have fixed corrupt system files, head over to the Task Manager (ctrl+Alt+Del) and see if the system and compressed memory usage is still on the high side. If that is the case, check out next solution.
2. Turn On ‘Automatically Manage Paging File Size for All Drives’
Pagefile size can be reset by the user but by default, Windows decides this on its own. If you have ever configured this part, only then you need to set it back to Automatic mode. Nevertheless, it does not cost to check it out yourself.
Step 1. In the Start menu (check if your Windows 10 Start Menu is not working), click ‘Settings’ and search for ‘Performance’.
Step 2. Choose the search result “Adjust the appearance and performance of Windows”.
Step 3. A new window with Performance Options will now open. Head over to “Advanced”, and click “Change” under Virtual Memory option.
![[FIX] ‘System and Compressed Memory’ High Disk Usage in Windows 10 | DeviceDaily.com [FIX] ‘System and Compressed Memory’ High Disk Usage in Windows 10 | DeviceDaily.com](https://www.devicedaily.com/wp-content/uploads/2017/10/003-FIX-System-and-Compressed-Memory-High-Disk-Usage-in-Windows-10.png)
Step 4. Check mark the first option you see in this pop-up window that says “Automatically manage paging file size for all drives”. Now click OK, then Apply.
![[FIX] ‘System and Compressed Memory’ High Disk Usage in Windows 10 | DeviceDaily.com [FIX] ‘System and Compressed Memory’ High Disk Usage in Windows 10 | DeviceDaily.com](https://www.devicedaily.com/wp-content/uploads/2017/10/004-FIX-System-and-Compressed-Memory-High-Disk-Usage-in-Windows-10.png)
Step 5. Restart your computer and head over to Task Manager to see if the above process has helped to bring down the system and compressed memory disk usage.
If this didn’t work, perform this Third Method.
3. Disable RunFullMemoryDiagnosticEntry to fix System and Compressed Memory High Usage
If the second method didn’t work that’s only because the size of paging files for all drives within your system wasn’t the source of the problem. While you may have to bear with system slowdown, you can apply this method to disable the system and compressed memory high usage for good. Follow these steps.
Step 1. Head to “Control Panel” by using your mouse to right-click on the Windows icon in the Taskbar (check out if your Windows 10 Taskbar is not working). When the Control Panel opens, type “Administrative Tools” in the search bar and open it.
![[FIX] ‘System and Compressed Memory’ High Disk Usage in Windows 10 | DeviceDaily.com [FIX] ‘System and Compressed Memory’ High Disk Usage in Windows 10 | DeviceDaily.com](https://www.devicedaily.com/wp-content/uploads/2017/10/005-FIX-System-and-Compressed-Memory-High-Disk-Usage-in-Windows-10.png)
Step 2. Once the “Administrative Tools” window opens, Click “Task Scheduler” to open it.
![[FIX] ‘System and Compressed Memory’ High Disk Usage in Windows 10 | DeviceDaily.com [FIX] ‘System and Compressed Memory’ High Disk Usage in Windows 10 | DeviceDaily.com](https://www.devicedaily.com/wp-content/uploads/2017/10/006-FIX-System-and-Compressed-Memory-High-Disk-Usage-in-Windows-10.png)
Step 3. Within the “Task Scheduler”, double-click “Task Scheduler Library” on the left-hand side and expand its contents.
![[FIX] ‘System and Compressed Memory’ High Disk Usage in Windows 10 | DeviceDaily.com [FIX] ‘System and Compressed Memory’ High Disk Usage in Windows 10 | DeviceDaily.com](https://www.devicedaily.com/wp-content/uploads/2017/10/007-FIX-System-and-Compressed-Memory-High-Disk-Usage-in-Windows-10.png)
Step 4. Double-click “Microsoft” on the left, and then on “Windows” that opens subsequently.
![[FIX] ‘System and Compressed Memory’ High Disk Usage in Windows 10 | DeviceDaily.com [FIX] ‘System and Compressed Memory’ High Disk Usage in Windows 10 | DeviceDaily.com](https://www.devicedaily.com/wp-content/uploads/2017/10/008-FIX-System-and-Compressed-Memory-High-Disk-Usage-in-Windows-10.png)
Step 5. When “Windows” options expand, click on “MemoryDiagnostic” on the left, to open its contents on the right.
![[FIX] ‘System and Compressed Memory’ High Disk Usage in Windows 10 | DeviceDaily.com [FIX] ‘System and Compressed Memory’ High Disk Usage in Windows 10 | DeviceDaily.com](https://www.devicedaily.com/wp-content/uploads/2017/10/009-FIX-System-and-Compressed-Memory-High-Disk-Usage-in-Windows-10.png)
Step 6. Usually, this should display just two options, choose “RunFullMemoryDiagnosticEntry” and right-click to choose “Disable”.
![[FIX] ‘System and Compressed Memory’ High Disk Usage in Windows 10 | DeviceDaily.com [FIX] ‘System and Compressed Memory’ High Disk Usage in Windows 10 | DeviceDaily.com](https://www.devicedaily.com/wp-content/uploads/2017/10/010-FIX-System-and-Compressed-Memory-High-Disk-Usage-in-Windows-10.png)
Step 7. Close all the windows of Task Scheduler and restart your system. Upon rebooting, check to see if you are facing the initial problem at all. You must notice that your Windows 10 has speed up a lot more.
4. Disable Superfetch to Fix System and Compressed Memory High Disk Usage
Superfetch is a Windows service that aims to monitor and improve your system performance. Since this is a daunting task, sometimes, Superfetch can also cause your disk usage to rise up to 100%. We have seen Superfetch causing Service Host: Local System (Network Restricted) high disk usage too. So this could possibly be the culprit.
Fortunately, this can be easily disabled if none of the above-listed methods do the trick for you.
Step 1. Open “Run” (Windows logo key+R) and type ‘services.msc’ then press Enter.
![[FIX] ‘System and Compressed Memory’ High Disk Usage in Windows 10 | DeviceDaily.com [FIX] ‘System and Compressed Memory’ High Disk Usage in Windows 10 | DeviceDaily.com](https://www.devicedaily.com/wp-content/uploads/2017/10/011-FIX-System-and-Compressed-Memory-High-Disk-Usage-in-Windows-10.png)
Step 2. Now scroll down to locate Superfetch in the Service Window that should open after the run command from step 1.
![[FIX] ‘System and Compressed Memory’ High Disk Usage in Windows 10 | DeviceDaily.com [FIX] ‘System and Compressed Memory’ High Disk Usage in Windows 10 | DeviceDaily.com](https://www.devicedaily.com/wp-content/uploads/2017/10/012-FIX-System-and-Compressed-Memory-High-Disk-Usage-in-Windows-10.png)
Step 3. It is set to Start by default, so click “Stop” by right clicking on it.
Step 4. Then right-click once again to choose “Properties” and under the General Tab, you should see “Startup Type” set us “Automatic”, set this to “Disable”.![[FIX] ‘System and Compressed Memory’ High Disk Usage in Windows 10 | DeviceDaily.com [FIX] ‘System and Compressed Memory’ High Disk Usage in Windows 10 | DeviceDaily.com](https://www.devicedaily.com/wp-content/uploads/2017/10/013-FIX-System-and-Compressed-Memory-High-Disk-Usage-in-Windows-10.png)
Step 5. Then click OK and Apply. Close all the services and proceed to restart your Windows computer.
5. End the Speech Runtime Executable Process
This is a common Windows process and pops up in the background even when you are not using it. It is known to consume heavy amounts of memory and one of the main culprits behind system slowdown.
You can easily select End Task for the Speech Runtime Executable Process in the Task Manager, listed under Processes tab.
![[FIX] ‘System and Compressed Memory’ High Disk Usage in Windows 10 | DeviceDaily.com [FIX] ‘System and Compressed Memory’ High Disk Usage in Windows 10 | DeviceDaily.com](https://www.devicedaily.com/wp-content/uploads/2017/10/014-FIX-System-and-Compressed-Memory-High-Disk-Usage-in-Windows-10.png)
This may pop up quite often, so make sure you end it each time. There is no permanent fix to this.
6. Adjust Visual Effects for Best Performance
With Windows 10, you get a rich viewing experience. You tend to watch a lot of movies on Netflix, play a lot of games and for all of this, your computer today is preset to give you the best visual effects rather. You can change its focus on giving you the best performance instead in the following steps.
Step 1. Right-click the “Windows logo” with your mouse and open “Control Panel”.
Step 2. In the search, type “Advanced System settings” and when the option is presented, click on it.
![[FIX] ‘System and Compressed Memory’ High Disk Usage in Windows 10 | DeviceDaily.com [FIX] ‘System and Compressed Memory’ High Disk Usage in Windows 10 | DeviceDaily.com](https://www.devicedaily.com/wp-content/uploads/2017/10/015-FIX-System-and-Compressed-Memory-High-Disk-Usage-in-Windows-10.png)
Step 3. You may be prompted for an administrator password, if you are one, then enter it and press enter.
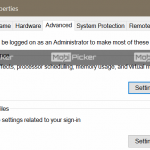
Step 4. Now, you will see a window named “System Properties”.
![[FIX] ‘System and Compressed Memory’ High Disk Usage in Windows 10 | DeviceDaily.com [FIX] ‘System and Compressed Memory’ High Disk Usage in Windows 10 | DeviceDaily.com](https://www.devicedaily.com/wp-content/uploads/2017/10/016-FIX-System-and-Compressed-Memory-High-Disk-Usage-in-Windows-10.png)
Step 5. In the first “Advanced” section, you will see “Performance”, click on “Settings” under this section.
![[FIX] ‘System and Compressed Memory’ High Disk Usage in Windows 10 | DeviceDaily.com [FIX] ‘System and Compressed Memory’ High Disk Usage in Windows 10 | DeviceDaily.com](https://www.devicedaily.com/wp-content/uploads/2017/10/017-FIX-System-and-Compressed-Memory-High-Disk-Usage-in-Windows-10.png)
Step 6. Change the setting to “Adjust for best performance”, instead of the default “Let Windows choose what’s best for my computer”.
![[FIX] ‘System and Compressed Memory’ High Disk Usage in Windows 10 | DeviceDaily.com [FIX] ‘System and Compressed Memory’ High Disk Usage in Windows 10 | DeviceDaily.com](https://www.devicedaily.com/wp-content/uploads/2017/10/018-FIX-System-and-Compressed-Memory-High-Disk-Usage-in-Windows-10.png)
Step 7. Click OK and Apply on all of the relevant windows and restart your computer. Upon booting up the computer, check to verify if the problem has been fixed.
If none of these above-listed problems work for you, it could mean that your RAMs have failed. If you’re not a hardware genius, it is best to take it to a service repair shop and have them take a look at it. The above-mentioned six methods will only work as long as, the problem is on the OS-level.
PS – Compiling the solutions for System and Compress memory high usage took me a lot of time and efforts, please consider sharing this post in your social circles, and share your thoughts in the comments below.
The post [FIX] ‘System and Compressed Memory’ High Disk Usage in Windows 10 appeared first on MobiPicker.
(145)

![[FIX] ‘System and Compressed Memory’ High Disk Usage in Windows 10](https://www.devicedaily.com/wp-content/uploads/2017/10/016-FIX-System-and-Compressed-Memory-High-Disk-Usage-in-Windows-10-520x341.png)
