How to 3D print huge models for cosplay and game rooms with the Neptune 4 Max
How to 3D print huge models for cosplay and game rooms with the Neptune 4 Max

Our 3D printing adventure so far has had us using the Bambu Lab A1 to print out cool, unique models for our perfect games room but what if you want something larger than a standard 3D printer can handle?
The Bambu Lab A1 is a great printer that requires very little effort but sometimes you are going to need to get your hands dirty with a more traditional 3D printer, especially if you are looking to make or even sell cosplay items that look amazing.
That’s where the Neptune 4 Max from Elegoo comes in. The behemoth of a 3D printer needs a few things – first, it needs a lot of space. It’s a big, heavy unit. On top of the actual space the unit itself needs you need to factor in space in front and behind it because, as it is a bed slinger, that build plate is going to fire forwards and backward.
So far, so obvious, but here’s another one that you may not have worried about quite so much if you have only had a smaller printer until now – a sturdy table.
The Neptune 4 Max runs on Klipper and that means it is fast and will throw the build plate around at breakneck speed.
The first surface I put it on was a standing desk, so therefore the legs have movement in them as it needs to go up and down, and I genuinely thought it might fly off the table. You need something sturdy here. And if it’s fixed down, so much the better.
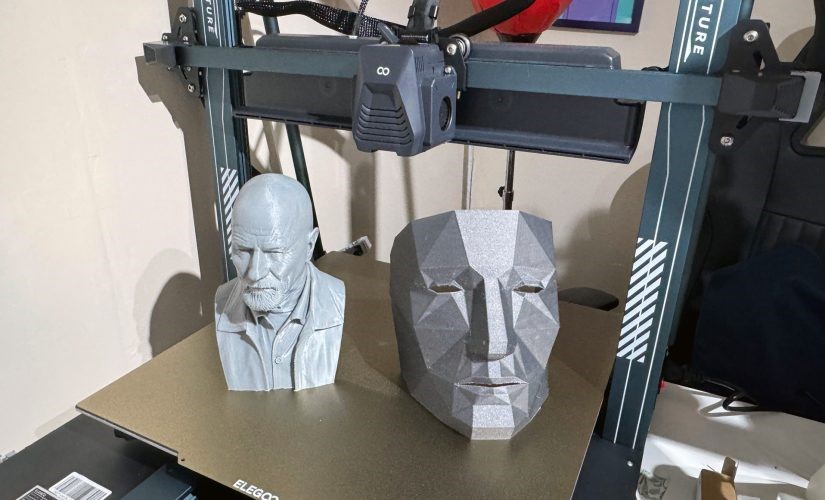
The Elegoo Neptune 4 Max is what’s also known as a ‘helmet-class’ printer. That means it has a big enough print volume to be able to print a full-size helmet, big enough for a human head for cosplay purposes. It has a build volume of 420 x 420 x 480 mm, which is slightly less than the Max 3, but this is due to the giant cooling fan strapped onto the gantry.
Even with a fast printer, these take a while so today we are just going to print a full-size cosplay mask, and then print something larger out for our game room – a large bust of Walter White from Breaking Bad to add a little Heisenberg to the place.

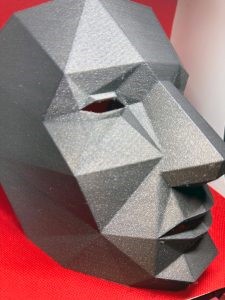
Starting with the mask we decided on this low-poly full face mask because it looks both sinister and cool. This was my first big print attempt and watching the 4 Max do its thing was a joy to behold. I had to leave it printing overnight as I didn’t start it until late in the day but woke up, checked the Fluidd interface via my phone while still in bed, and was delighted to see it had printed perfectly. The only supports here were on the hooks for the ears and they were removed easily.
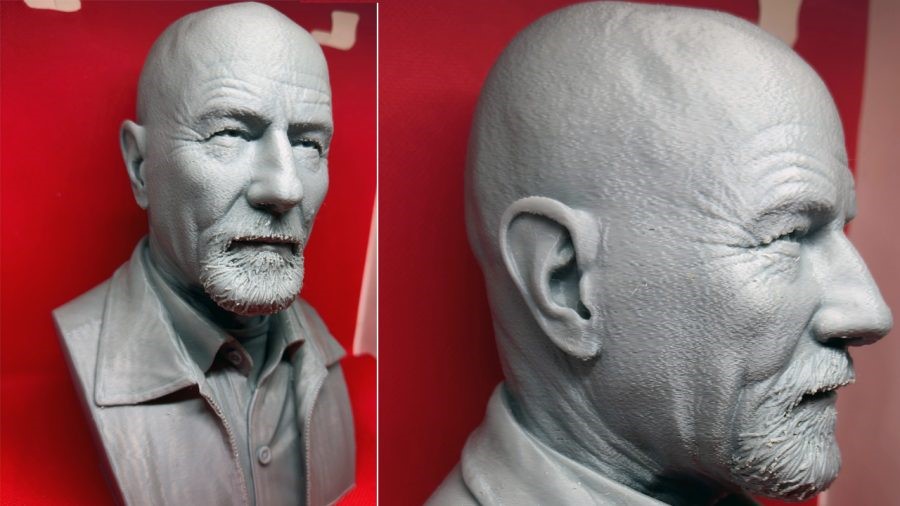
Next up is our second piece, the Walter White bust from Sid Naique. I wanted to print this so much larger but plumped for a smaller than I wanted size simply because I was put off by the two-day print time to make it a lifesize head. One day though when deadlines aren’t as pressing.
Again the bust printed flawlessly and even with the slightly tricky support around the beard, this all came away easily and the Elegoo PLA+ in grey worked a treat.

This is one of my go-to prints when I want to show off the 4 Max, the level of detail is insane even with the 0.4mm standard nozzle (will somebody please let me buy different-sized nozzles). This would look great on any shelf in your games room. I think I am ultimately going to print him again with a marble PLA to make him look that bit more, er museum!
So let’s have a look at the print experience as we did with the Bambu Lab A1 in our last 3D model feature.
What is the Neptune 4 Max like?
My time with the 4 Max has been a bit of a mixed bag, but fortunately, it all seems to have turned out alright in the end. From the off it printed great, putting out really high-quality prints. After a week or so suddenly nothing would stick to the plate, the Z-offset was all over the place and no amount of leveling seemed to help. Then I had a huge problem with the extruder as when the print reached a certain part of the axis the temperature reading would drop from around 180C to 0. Obviously, this was a false reading but it would cause Klipper to crash mid-print.
With some excellent help from Elegoo Support, we established there was a dodgy connection in the cable from the main board to the print head so they arranged to replace that. As all this was happening though the Neptune 4 Max suffered a huge clog that destroyed the entire hotend and heat block. Fortunately, Elegoo replaced the entire print head for me, but I did have to wait for that to arrive from China which delayed this page. It seems to me as though there may be a slight design flaw in the way that if a clog starts and you don’t notice it, it gathers speed and runs away to self-destruction under the silicon sock and that is pretty much the end of that, you need a spare part as the thermistor and other wires are encased like Han Solo in Carbonite. The problem is at the moment, with it being a new model and using a proprietary nozzle, you can’t just get them on Amazon and need to go through Support, which is frustrating when you just want to print stuff.
I must emphasize though that Elegoo Support is among the best there is in the 3D printer world, it’s just that post from China, even UPS isn’t always the fastest.
Now however, after a couple of firmware upgrades and a change of the cable and hotend (which was a pain in the rear), the Neptune 4 Max is working flawlessly like a charm and I can trust it to do what I want. It is a more hobbyist printer though than say a Bambu Lab, so you need to have some 3D printer experience to get the most out of it and get it dialed in perfectly. I was undoubtedly unlucky, but big printers are not necessarily ideal as your first bit of 3D printing kit. Now it is working fine would I recommend the Elegoo Neptune 4 Max for this kind of project?
Absolutely, for the price the speed and build size are great, and if you are looking to get into printing props, cosplay, and large items for your game room, you can’t do much better for the cost. Also, the great customer support is reassuring, there is an active discord, and hopefully, spares will be available in Amazon warehouses soon which will take the pain out of the nozzle issue.
Finishing our printed models
We used a sparkly filament for the mask and in the main it genuinely doesn’t need much sanding down, such is the quality of the print. We did a little work where the supports on the eyes and mouth but generally that was it. Again, with Walker White things came off pretty clean but we will sand down the areas where the arms would be for a smooth finish before priming for painting. Because the detail on the model is so good, Walter’s beard, stubble, and shaved head don’t need sanding because they are stubbly, which cuts down post-work a lot.
Neptune 4 Max slicer settings
We didn’t use anything other than a basic 0.2mm later height in either model. You could, if you had the time reduce that for the bust but the mask certainly doesn’t need it. We sliced and printed the models in Orcaslicer, which is the current go-to slicer for the 3D printing game at the moment.
The post How to 3D print huge models for cosplay and game rooms with the Neptune 4 Max appeared first on ReadWrite.
(29)


