How to Delete Songs from iPhone and iPad (Step-by-Step)
When even one GB of storage space on your iPhone/iPad is precious, it always helps to know how to delete songs from iPhone and iPad to free some space. You love music. We all love music. But if there are too many songs on your device, storage can become a pressing concern. Soon, you’ll start running out of space, more so if you own a 16GB iPhone or an iPad with less storage. At some point in time, you will start to wonder – how do I delete songs from my iPhone? This post will answer your question. Continue reading!
How to Delete Songs from iPhone and iPad
Deleting music from iPhone can be down in two ways – using your iPhone or using iTunes. We will explore both methods. Additionally, we’ll also see how we can delete songs from Apple Music.
1: Deleting songs from iPhone / iPad directly
Before we discuss the solutions for “how to delete songs from iPhone”, you need to know how to distinguish the purchased content (music) from the one that’s saved on your device. Look for the download icon (shown below). If you see the download icon, it means that the music is purchased but not saved on your device. Let’s talk about deleting saved content from your iPhone.

Delete all iPhone music in one go
If you don’t wish to break your head thinking a lot about how to delete songs from iPhone, you can delete all music in one go. Follow these steps if wish to wipe all music on your iPhone –
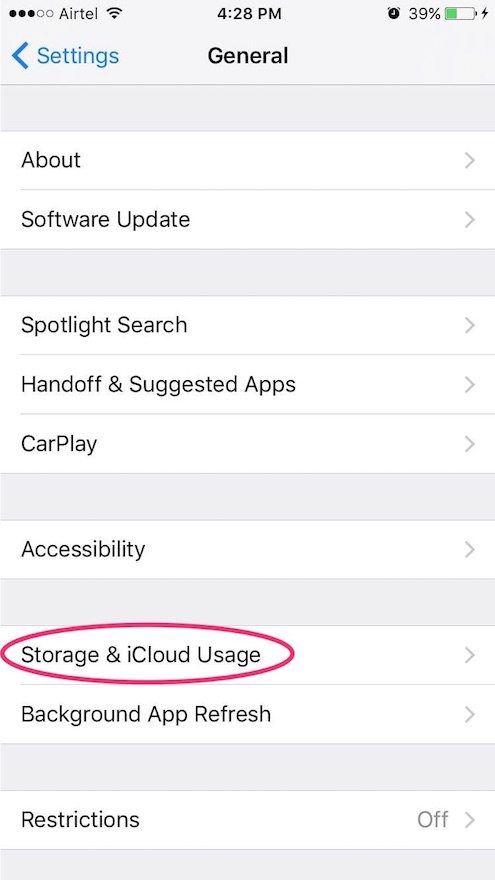
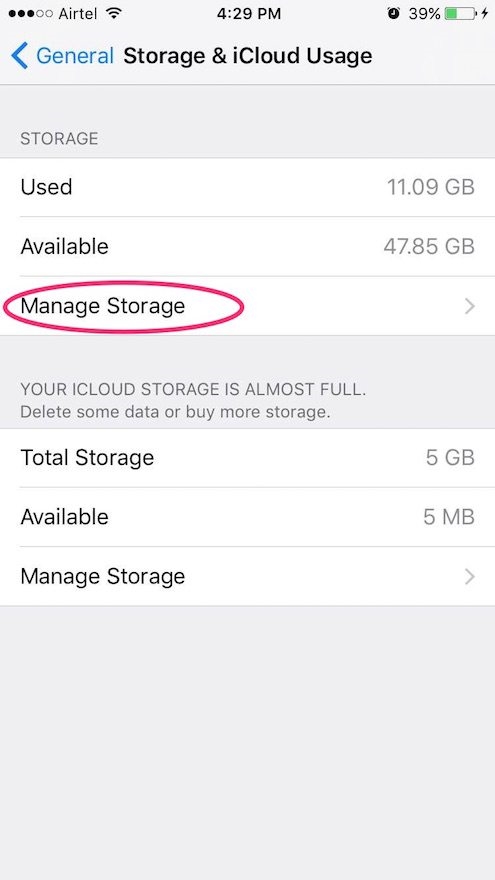
1. Head to Settings -> General -> Storage & iCloud Usage -> Manage Storage
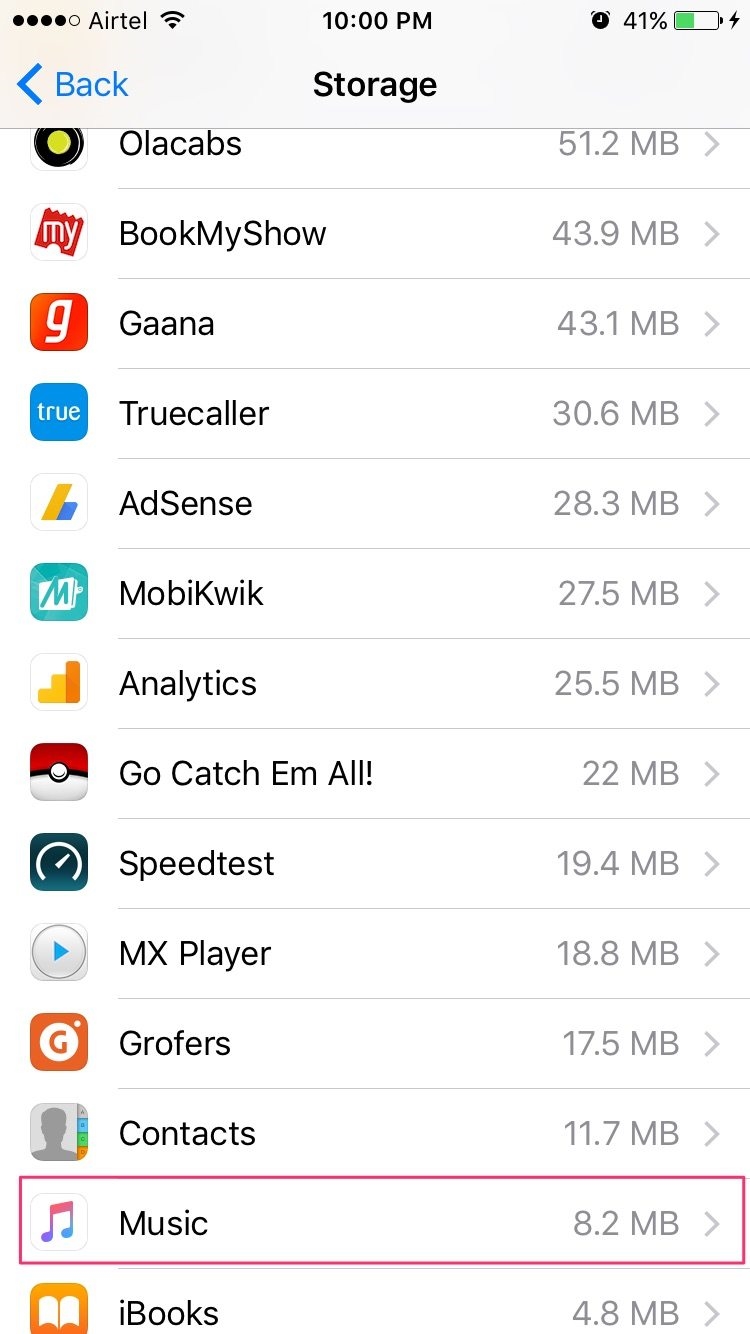
2. Scroll down to find the Music app. Tap on the Music app
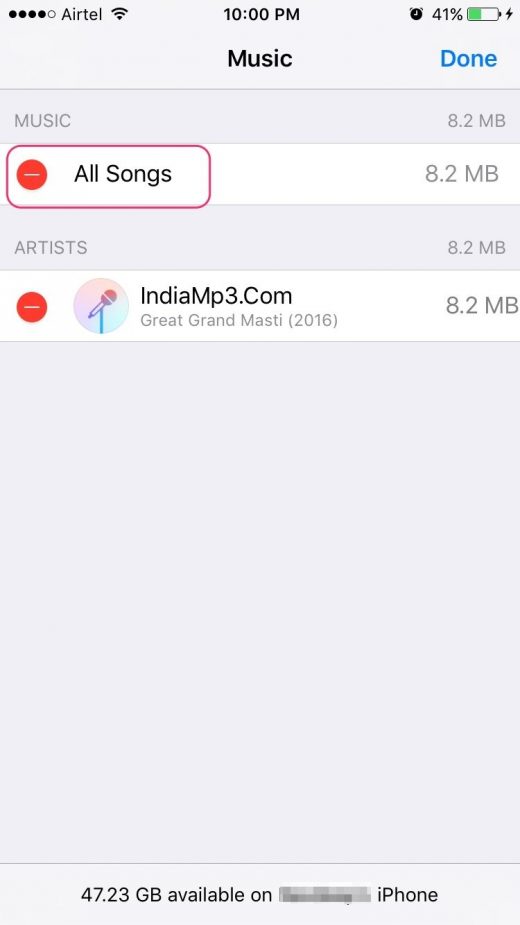
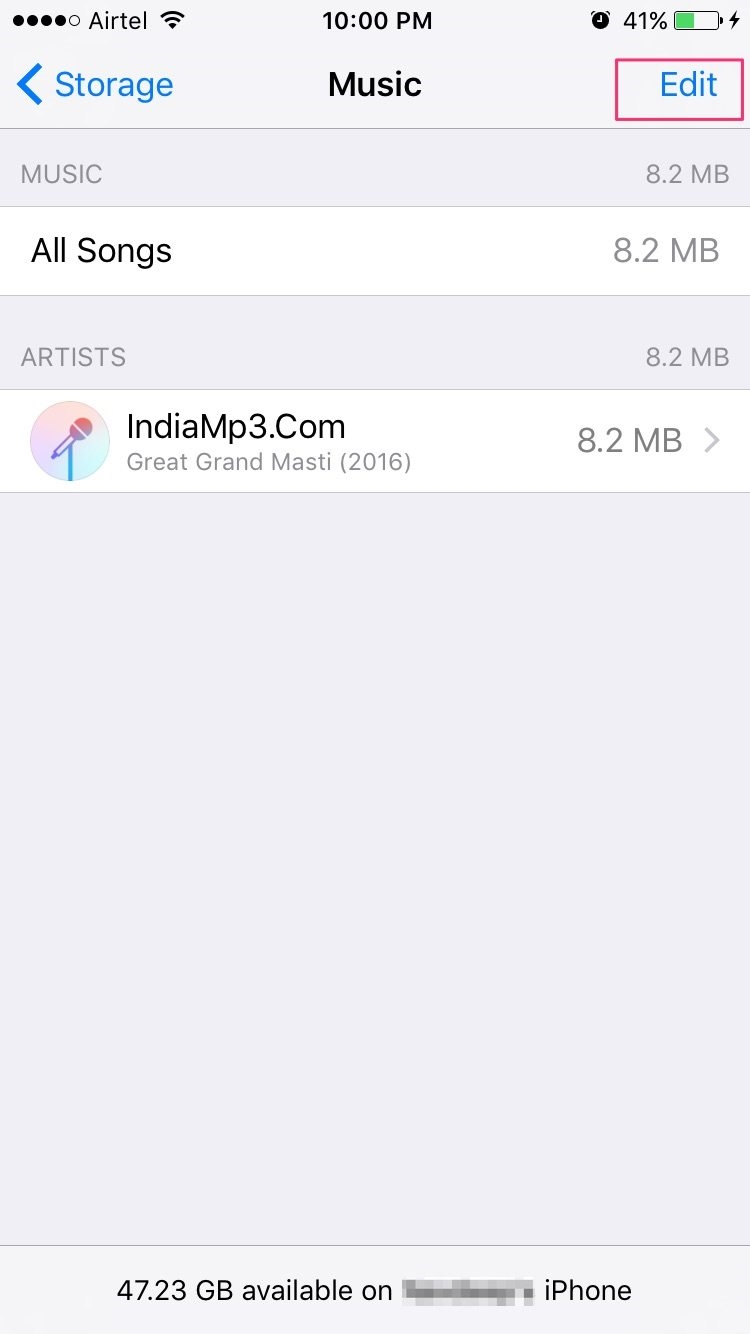
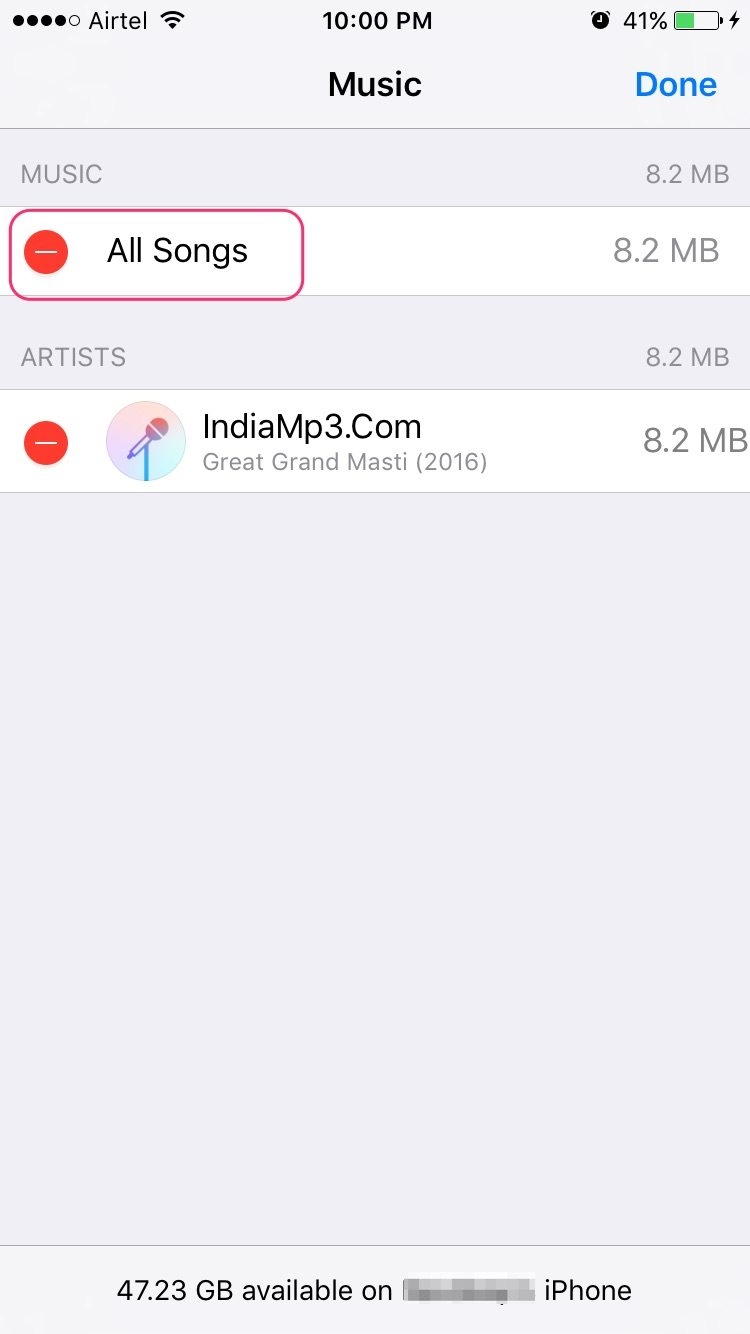
4. In the upper right, you’ll see an Edit button. To delete all songs, tap the red circle next to All Songs.
Selectively delete music
To selectively delete music, follow these steps (above images will help you to locate below guide options too):
1. Head to Settings -> General -> Usage.
2. Storage section -> Manage Storage.
3. Scroll down to find the Music app. Tap on the Music app.
4. In the upper right, you’ll see an Edit button. Tapping on the Edit button shows red circles for each song. Tap the red circle for the music you wish to delete. Head to the top right corner and tap Done.
Read – How to make ringtones on iPhone
2: Deleting music from iPhone/iPad using iTunes
To use this method, you need to plug in your iPhone into the computer. After you click on iPhone icon in iTunes, follow these steps –
1. Head to My Device Section -> Music.
2. You’ll see artists, albums, and playlists. Use cmd+A to select ALL and then press Delete key. Confirm when prompted.
3. Click on Summary at the top left pane column and clock on Apply at the bottom right of the main pane.
If you are wondering what happens to songs you purchased on iTunes, the music will be available as always. To get the songs you purchased back on your iPhone, follow these steps-
- Head to Settings -> Music.
- Tap on Show All Music.
All the music that you purchased is now available, but with the download icon displayed next to it. To download them back to your iPhone, just tap on the download icon.
3: Remove songs from Apple Music
To remove songs downloaded from Apple Music, follow these steps –
- Launch Music app. Tap on My Music.
- You’ll see two options on the top of your iPhone’s screen: Playlists and Library. Tap on either of them, preferably where you have download songs.
- Once you see a list of songs, tap on three dots that appear beside each song. From the drop-down menu, choose Remove Download.
Note that this only removes songs made available offline. To remove the song permanently from Apple Music, choose Remove from my music instead of Remove Download. This wipes out the song entirely. There’s no way you can get it back.
4: Remove purchased content from Apple Music
To delete purchased content from Apple Music, follow these steps –
- After launching Music, tap on My Music.
- Select a song synced via iTunes. Tap on three dots that appear beside the song. Tap on Delete option in the menu. Confirm when prompted.
- Tap on Delete from iCloud Music Library.
This way, the content you purchased can be deleted and can never be recovered.
That’s it, folks! We hope you are now aware of various possible ways of deleting songs from iPhone/iPad. There may be minor changes with respect to user interface options and wordings depending on the iOS version. We are sure you can figure that out. But the basic steps remain the same. If you were looking for any other issue and we didn’t cover it here, drop us a comment below and we will help you fix your problem. Meanwhile, if you are looking at other ways of clearing data on your iPhone, check out our post on how to delete documents and data on iPhone.
The post How to Delete Songs from iPhone and iPad (Step-by-Step) appeared first on MobiPicker.
(25)

