Sometimes when you try to install a new application or drivers, they fail due to Antivirus protection. As we all know Anti-viruses don’t allow installations from unknown sources, but sometimes it misreads even trustable setups as a threat. Due to these reasons, when you want to install new software, you may need to disable your Antivirus temporarily. In this guide, we will cover specifically about Avast users, so if you are one of them and wondering how to disable Avast, keep reading. We will tell you how to disable Avast temporarily on Windows as well as Mac using a few simple steps. We will also show you how to turn off individual Avast antivirus shields. Let’s start with a little introduction
Contents
- 1 Why Should You Disable Avast Temporarily?
- 2 How to Disable Avast Antivirus
- 2.2 How to Disable Avast on Mac
Why Should You Disable Avast Temporarily?
There comes a time when you need to install a new software or a driver, and your antivirus keeps stopping their installation. They also sometimes block your favorite website or application. It is a very common problem. Sometimes your antivirus detects the changes which are being made by an unknown application while installing as false positives. In such cases, you need to disable your antivirus protection for a while. Many of our users came up to us with questions about disabling Avast firewall for a while. To answer all such questions, we have prepared this guide. Check out the following steps to disable Avast temporarily.
How to Disable Avast Antivirus
In this tutorial, we will cover how you can easily turn off Avast antivirus in your Windows or Mac computer. We have divided this article in two sections, one for Windows 10 (or older versions), and another is for Mac. Just move to the preferred section and disable Avast as long as you need.
How to Disable Avast on Windows
Follow the below methods to disable complete Avast antivirus security or individual antivirus shields in Windows 10, Windows 8, or Windows 7 PC.
1. Disable Complete Avast Security on Windows
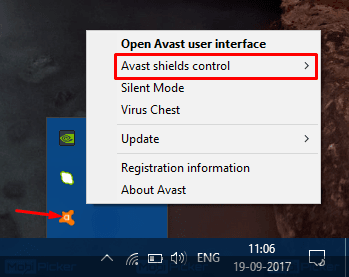
Step 1. Go to your Windows taskbar (read this if taskbar is not working on Windows 10) and right click on Avast’s icon. Select Avast! Shields control.
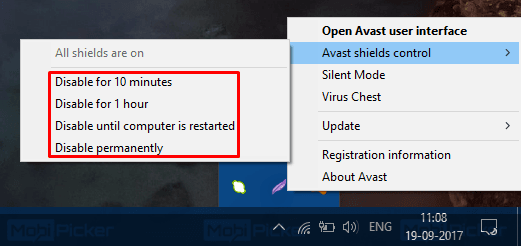
Step 2. You will see four options with different time durations. They will be:
- Disable for 10 minutes
- Disable for 1 hour
- Disable until computer is restarted
- Disable permanently
Select the time duration which suits your need.
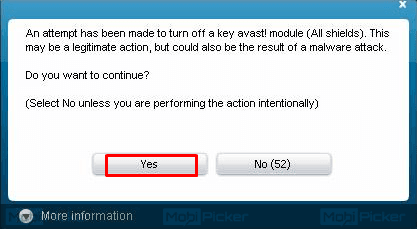
Step 3. When you click on your chosen time duration, the Avast antivirus will ask you for confirmation. Select Yes. It will disable your Avast antivirus temporarily for the selected duration.
2. Disable Individual Avast Antivirus Shields in Windows
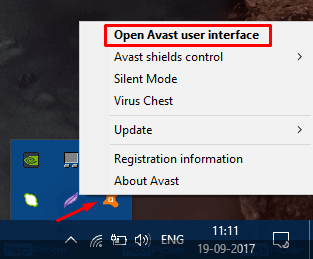
Step 1. Go to your windows taskbar and right click on Avast’s icon. Select Open Avast user interface.
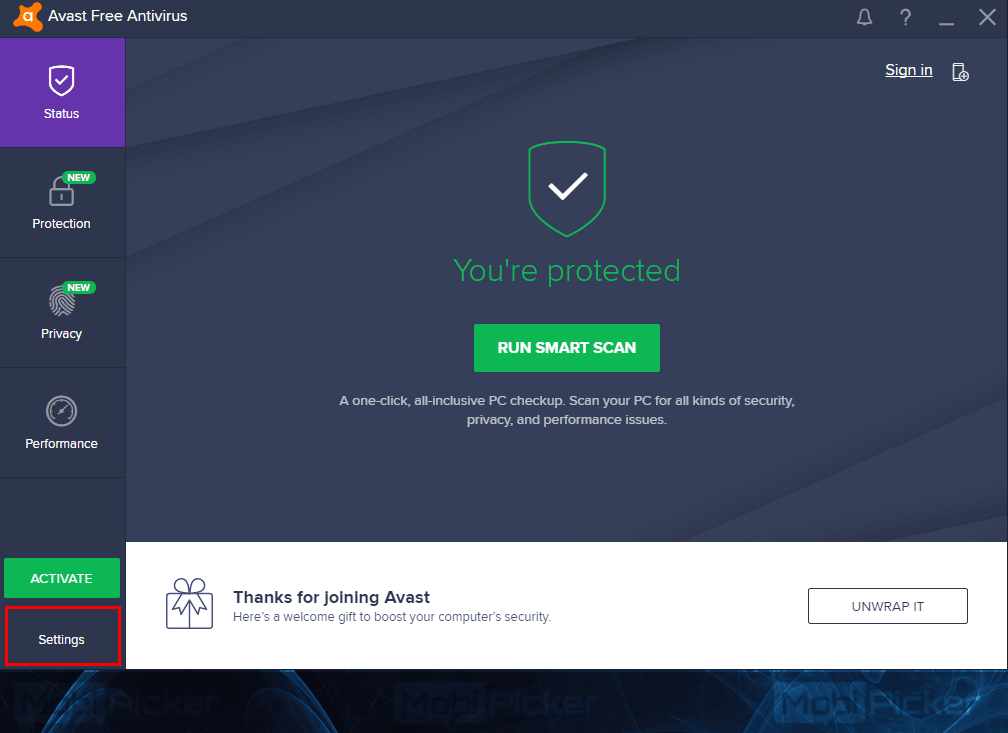
Step 2. Go to Settings.
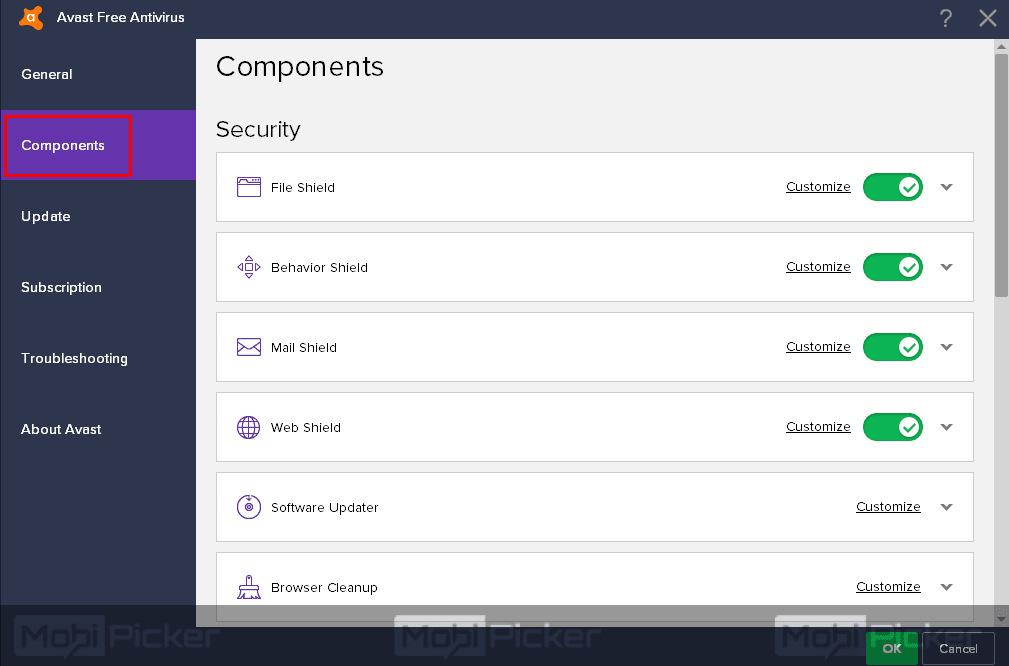
Step 3. Select Components. It will show you the list of shields, which are currently active on your computer. Avast antivirus has three levels of protection. They will be like this:
- File System: It protects the files present on your computer.
- Mail Shield: It protects your computer from incoming mails, which may contain malicious content.
- Web Shield: It monitors the websites you visit for suspicious behaviour and spam protection.
Step 4. Select On next to each shield. This will show you different time durations, for which you can select to disable that particular shield. These time durations will be:
- Disable shield for 10 minutes
- Disable shield for 1 hour
- Disable shield until computer is restarted
- Disable shield permanently
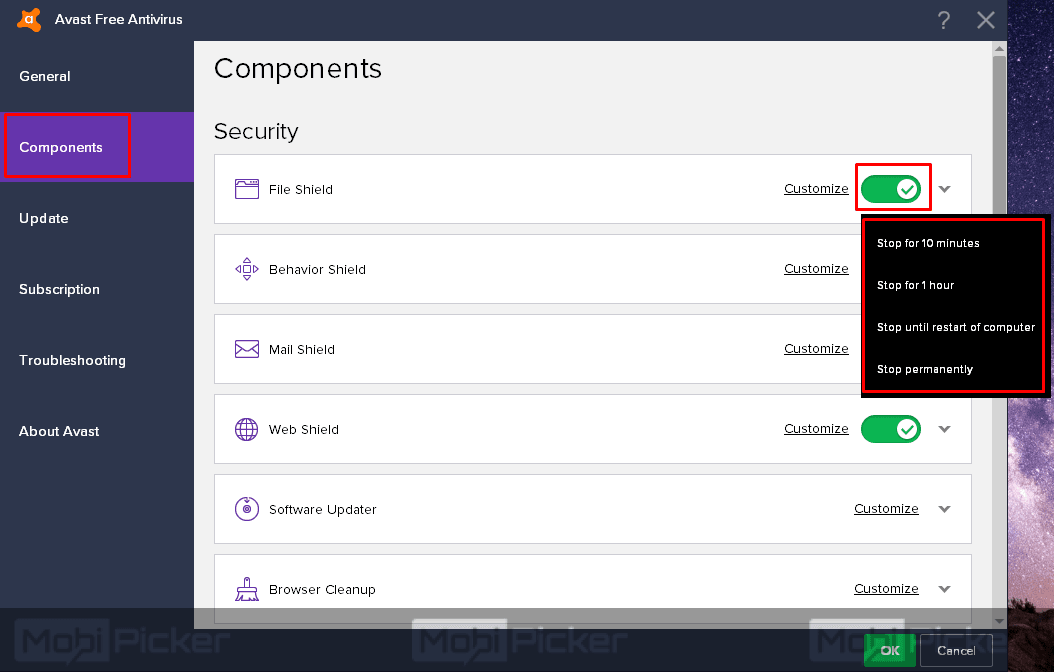
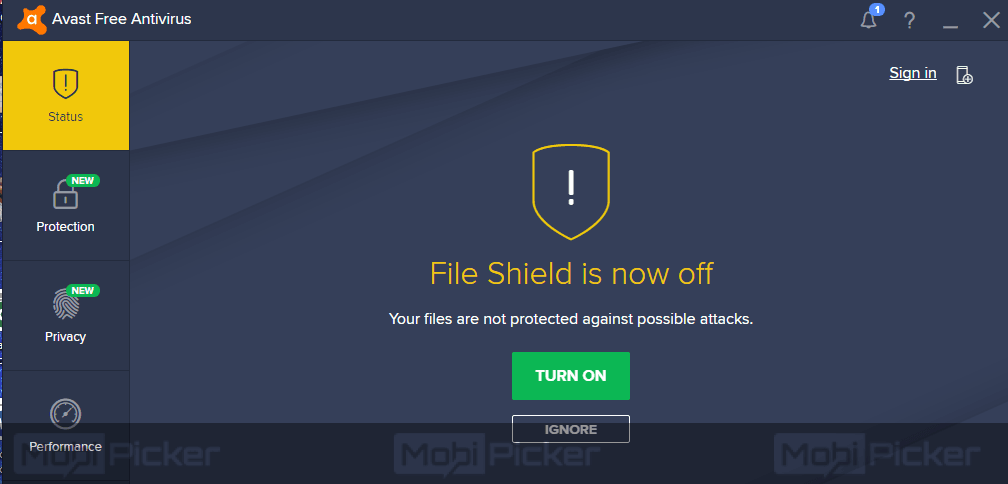
Step 5. Select the time duration and click Ok. It will disable the particular shield for your chosen time duration. The message will be displayed by the antivirus in Status that the particular shield is off. This is a confirmation that a shield has been disabled successfully.
How to Disable Avast on Mac
If you are a Mac user, you can disable Avast on Mac by following the steps below.
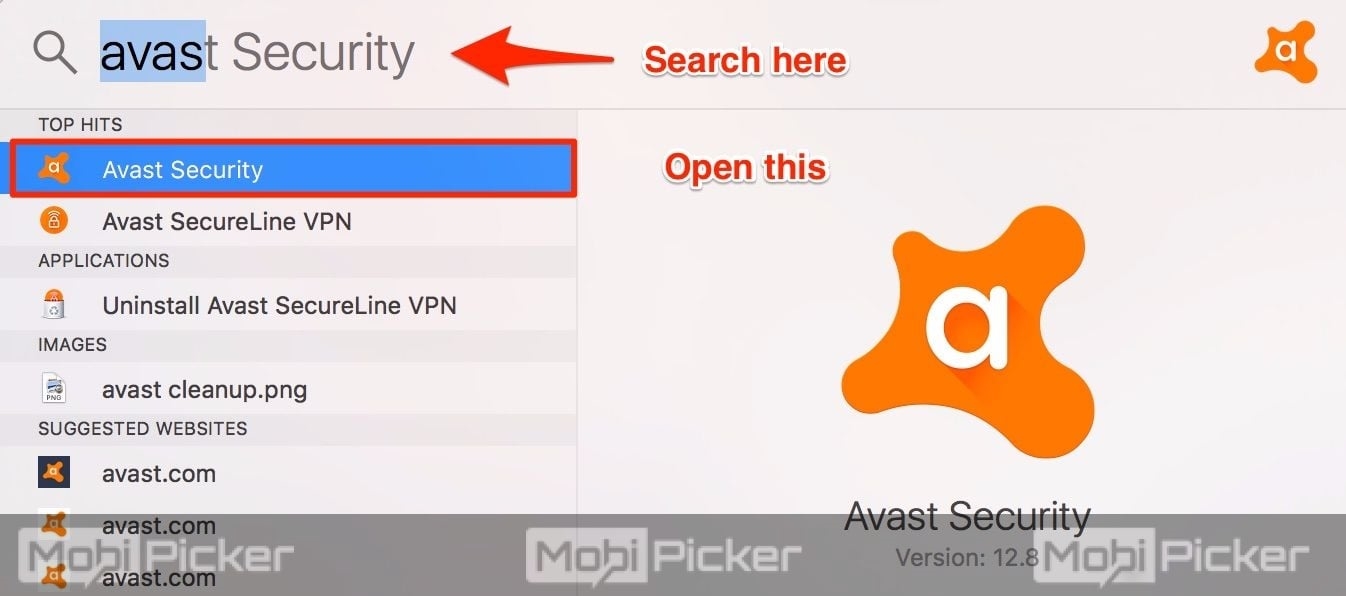
Step 1: Start typing “Avast” in search box and then open “Avast Security” from it.
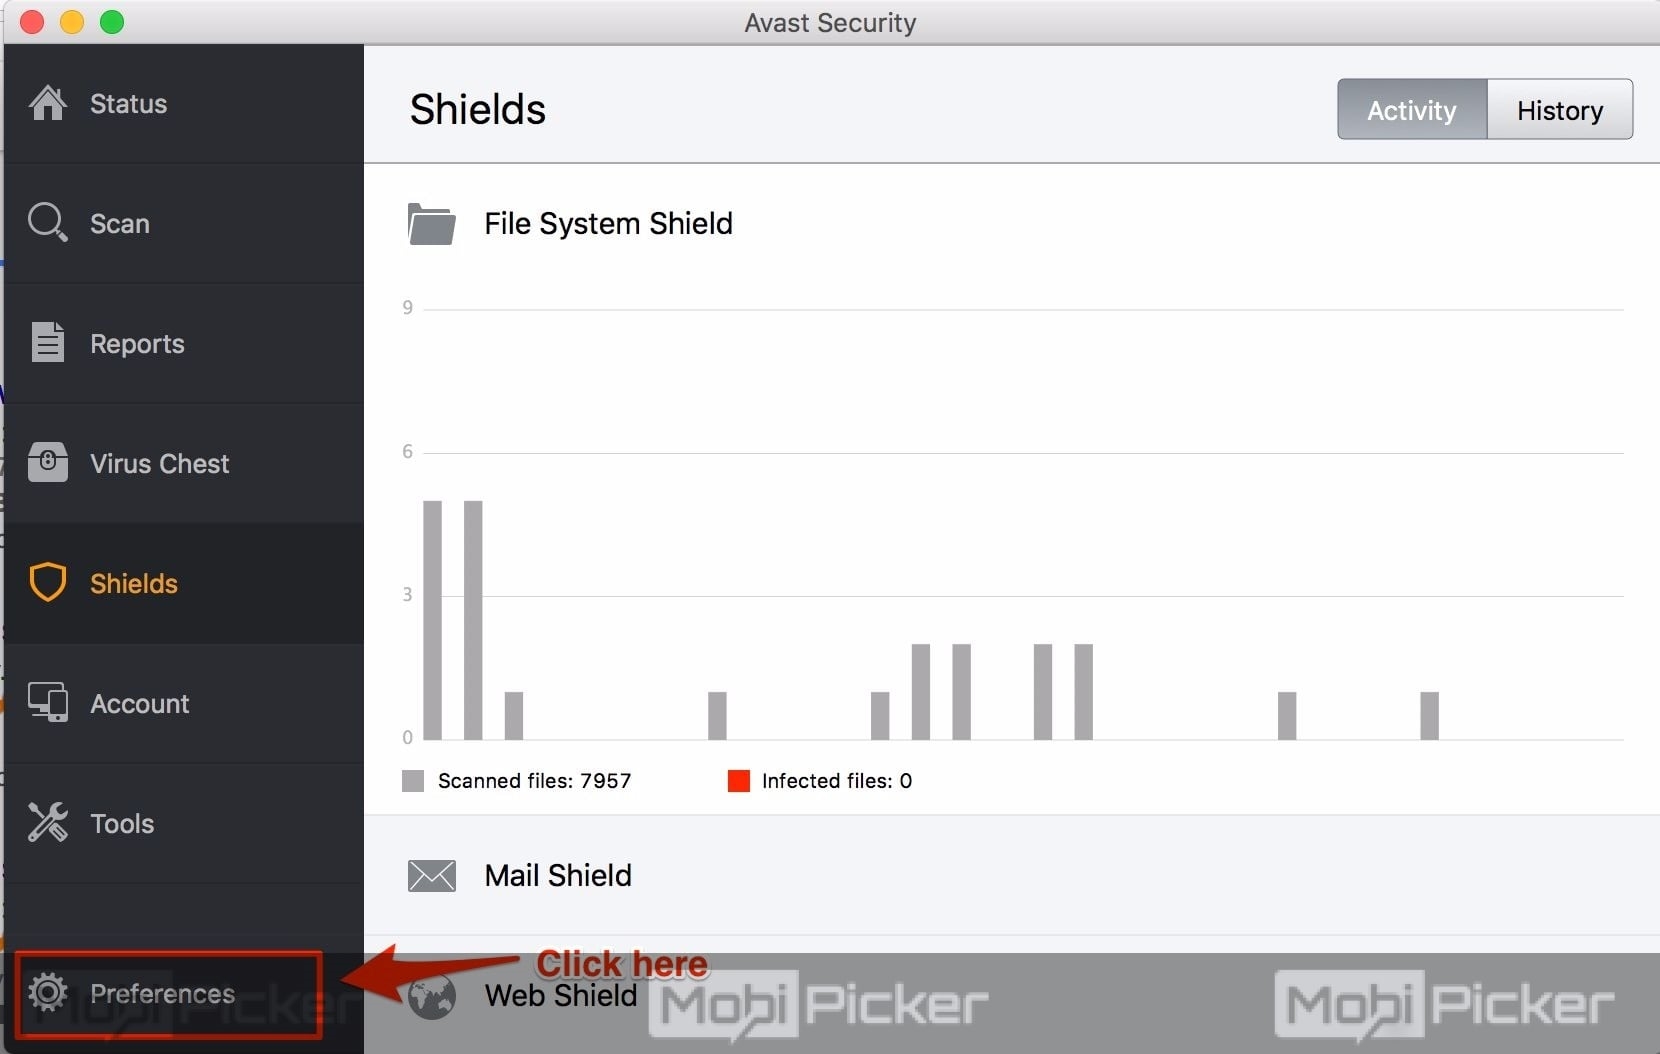
Step 2: Click on “Preferences” as shown in the image below.
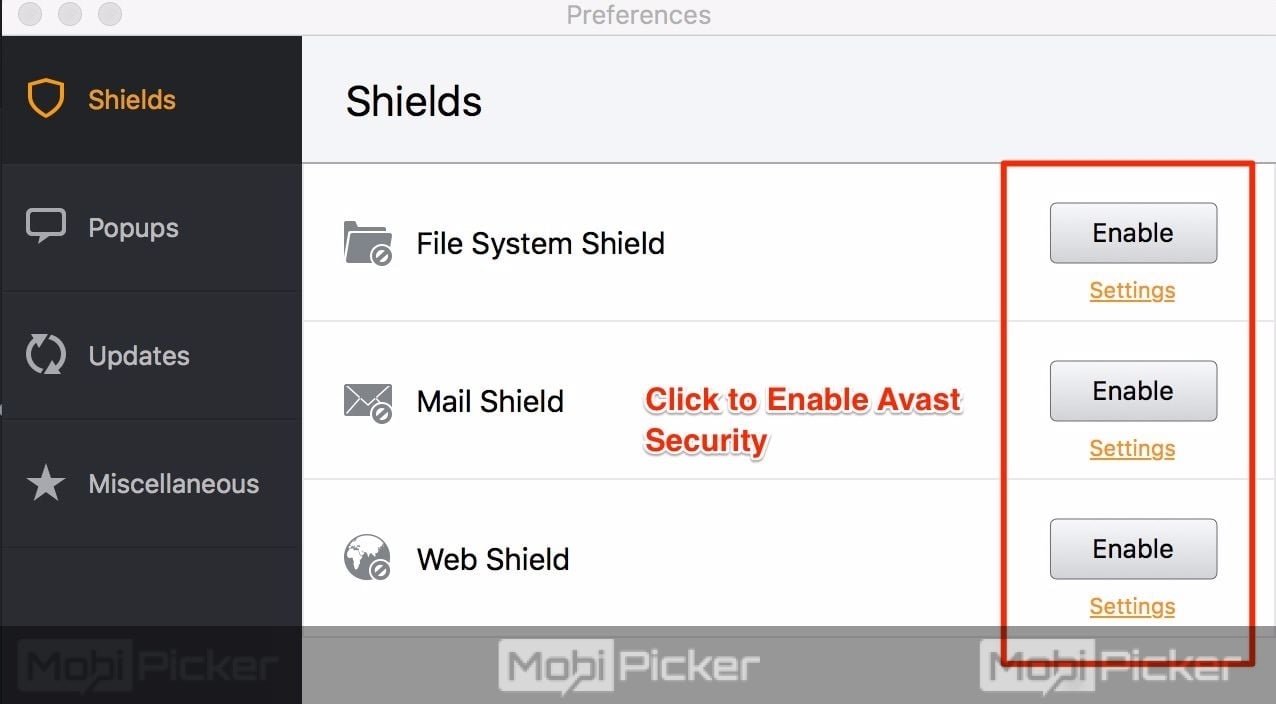
Step 3: Here you will see three type of Avast Shield; File System Shield, Mail Shield, and Web Shield.
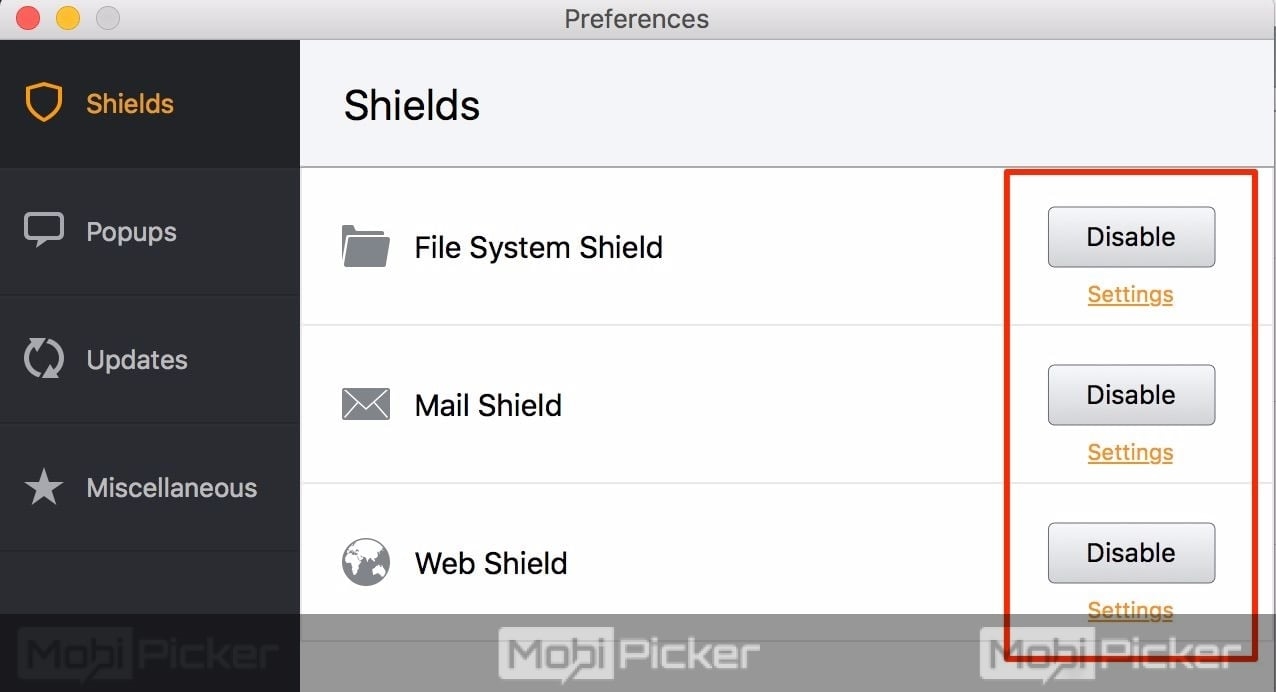
Step 4: Click on “Disable” option for the shield you want to disable, and then enter administrator password when prompts. It will disable the Avast antivirus on Mac.
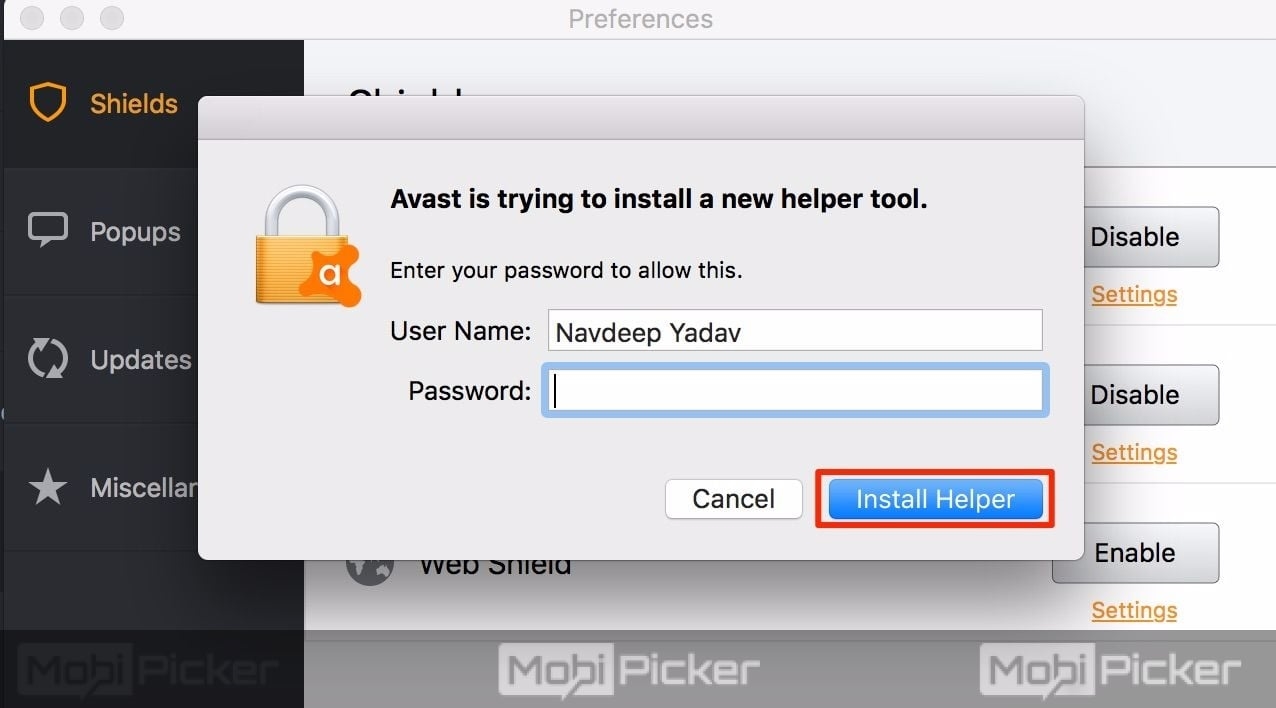
Step 5: When your requirement is completed, you can turn on Avast by going to Preferences as shown earlier, and then click on “Enable.”
Conclusion
Antivirus is very important for our computers. As soon as you are done doing what the antivirus was blocking, we recommend you to turn protection back to On. These steps work for every other antivirus as well. We hope you now know how to disable Avast temporarily on Windows and Mac. In case of any confusion or error, let us know in the comments below.
The post How to Disable Avast Antivirus on Windows and Mac OS appeared first on MobiPicker.
(190)