How to Fix Antimalware Service Executable (MsMpEng.exe) High CPU Usage
Windows 10 is still full of many bugs and there are a number of processes’ eating CPU. Antimalware Service Executable is one such process which has been causing high CPU usage in Windows 10 computers. Antimalware Service Executable is actually the name of process MsMpEng.exe, which is run by Windows Defender. Any process which causes a lot of CPU usage is a bad news for any computer. This just slows down your system and it becomes very annoying using it. But you don’t have to worry about that anymore because we are going to help you fix this problem.
What is Antimalware Service Executable in Windows 10
Windows Defender or Windows Defender Antivirus was introduced to us in 2006 as a free antispyware program in Windows XP. After being tagging along in Windows Vista and Windows 7, it was made into a full antivirus program in Windows 8. And since then, it has been with us protecting our computers from viruses and malware. The Antimalware Service Executable is a background service of Windows Defender. The process MsMpEng.exe checks files for malware while we access them, performs background scans to find dangerous software and installs antivirus definition updates on our computer. All in all, this is a very important process of Windows Defender.
Windows 10 already has many bugs. Microsoft is regularly releasing patches and updates, which has significantly decreased the number of bugs in Windows 10. But, the antimalware service executable’s high CPU usage is still not fixed. Hope, they’ll soon fix this error too. We don’t know when is that going to happen. So, till then, we can try and fix the problem using our ways.
How to Stop High CPU Usage by Antimalware Service Executable
Normally, the high CPU usage by this process is due to its real-time feature. The constant scanning of files can result in using a lot of disk usage. As there is no official method to fix this issue, we will try to solve the problem using our methods.
1. Reschedule Windows Defender
As the high disk usage is happening probably due to the real-time protection, we can change the schedule of Windows Defender to fix it.
Step 1. Press Win logo key + R, to open Run. Type taskschd.msc and click OK.

Step 2. Now, on the left sidebar, follow below path:
Task Scheduler Library > Microsoft > Windows > Windows Defender.
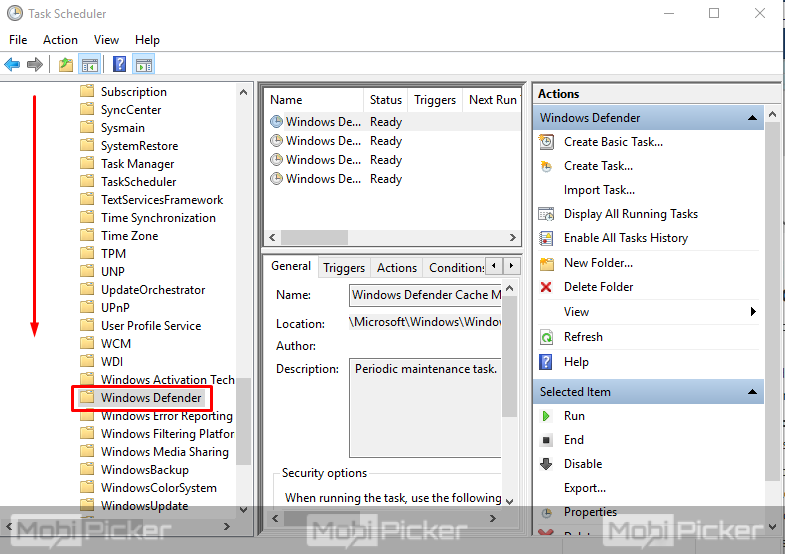
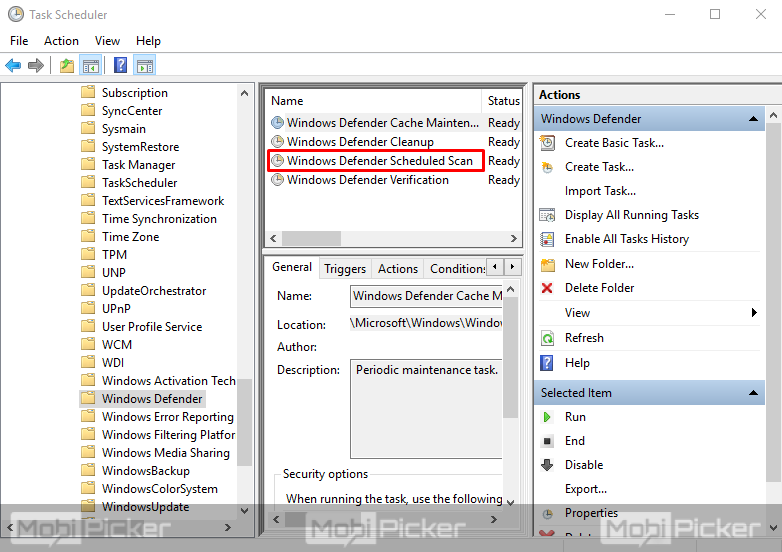
Step 3. Now, focus on the middle pane. Look for Windows Defender Scheduler Scan and double-click on it. This will open Windows Defender Scheduler Scan Properties in a new dialog box.
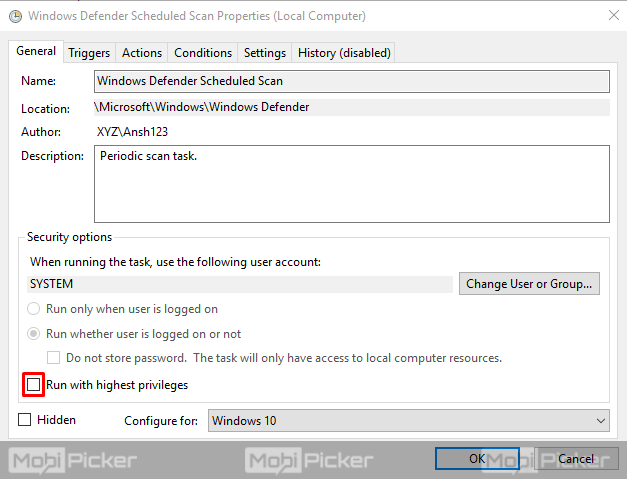
Step 4. Under the General tab, unmark the box beside Run with highest privileges.
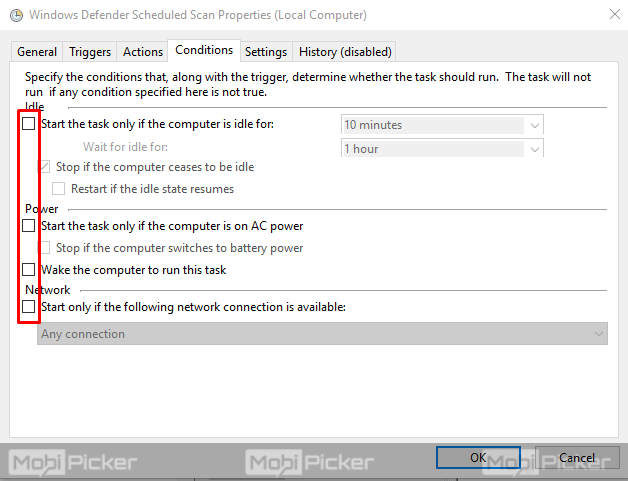
Step 5. Now, select Conditions tab and unmark all the boxes under the tab.
Step 6. Go to Triggers tab and select New.
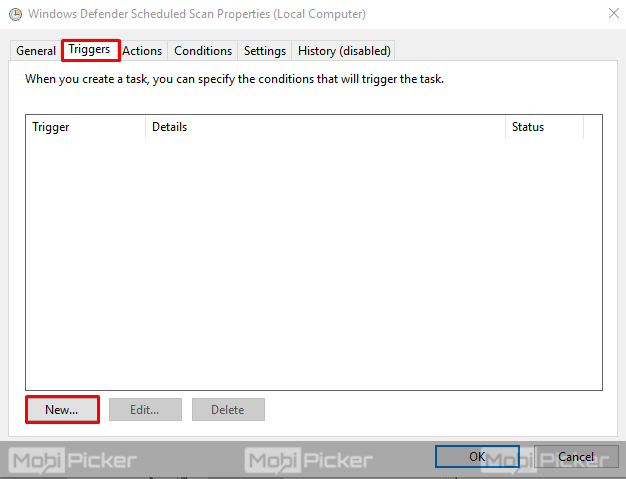
Step 7. A new dialog box will open after the last step. Select the weekly or monthly option as per your preference. Also, select the preferred day and time. Mark the box at the bottom beside Enabled and click OK.

This will schedule the scan according to your selection and should fix the high CPU usage error when the scan is not running.
If the problem still persists, follow the next method.
2. Add Antimalware Service Executable to Exclusion List
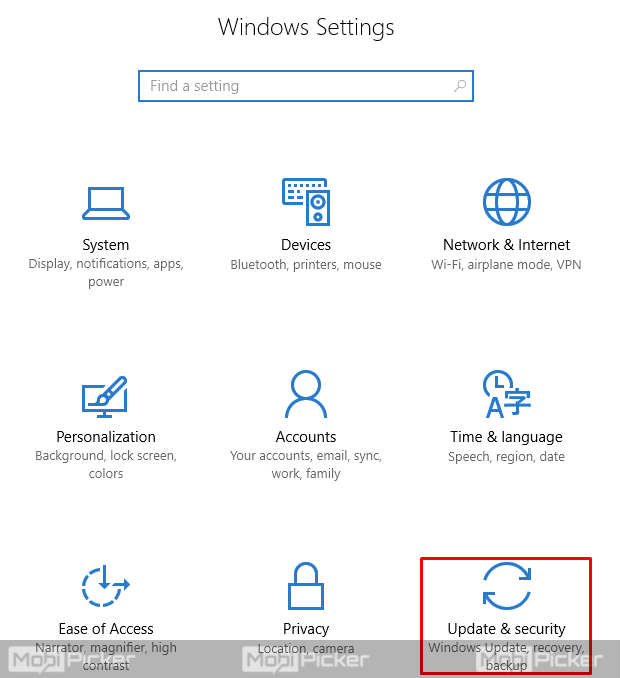
Step 1. Press Win logo key + I to open Settings. Select Update & Security.
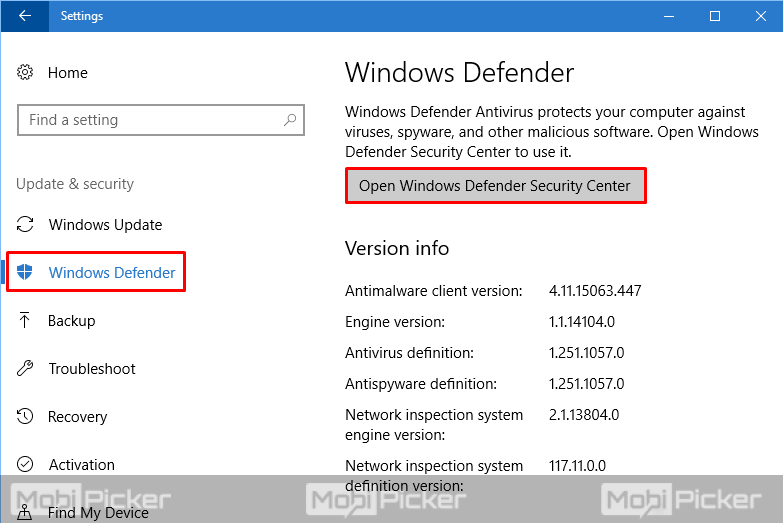
Step 2. From the left sidebar, select Windows Defender. Click on Open Windows Defender Security Center.
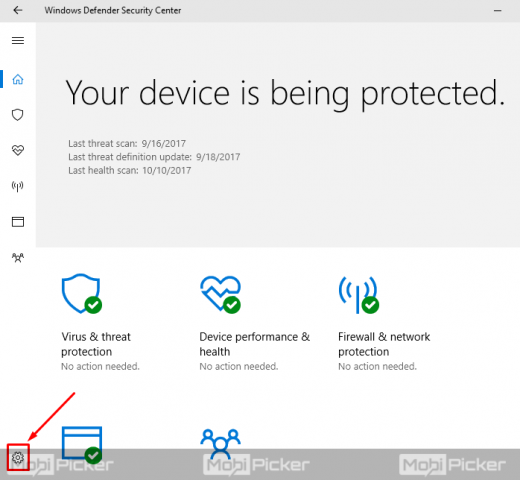
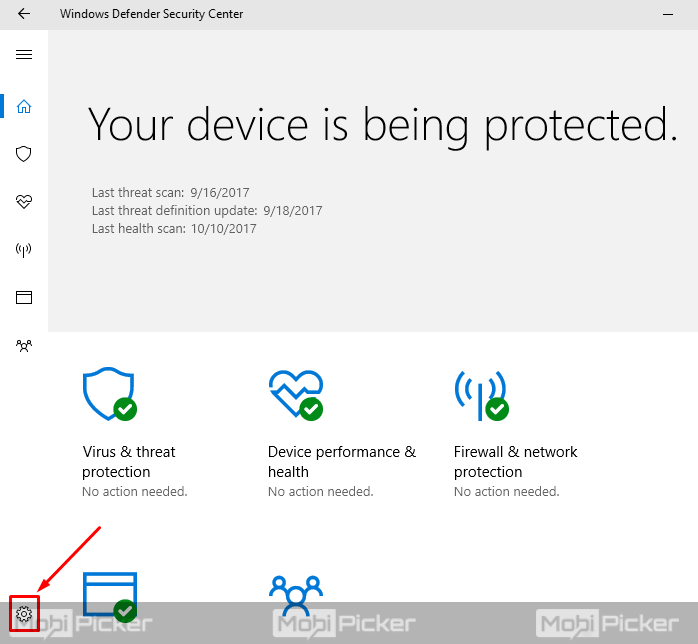
Step 3. On Windows Defender Security Center dialog box, select the gear icon at the left bottom.
Step 4. Select “Virus & threat protection settings.”
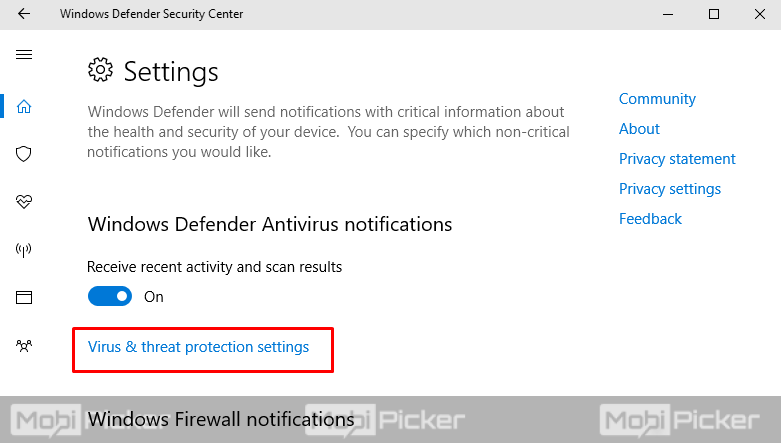
Step 5. Now scroll down and click on Add an exclusion under Exclusions.

Step 6. Click on Add an exclusion and select Process from options. This will open a pop-up window.

Step 7. Type MsMpEng.exe and click Add.

This will add the Antimalware Service Executable to the Windows Defender exclusion list. The error must be fixed now.
3. Turn off Windows Defender
If none of the above-mentioned methods work, then turning off Windows Defender is the only option left. This method has worked for a lot of users in fixing the issue. Although I should warn you, this will leave your computer unprotected from any threat. This is why you should install an antivirus program before continuing with this method.
Step 1. Press Win logo key + R, to open Run. Type regedit and click OK. This will open Windows Registry.

Step 2. On the left sidebar, you need to follow the following path:
HKEY_LOCAL_MACHINE > SOFTWARE > Policies > Microsoft > Windows Defender
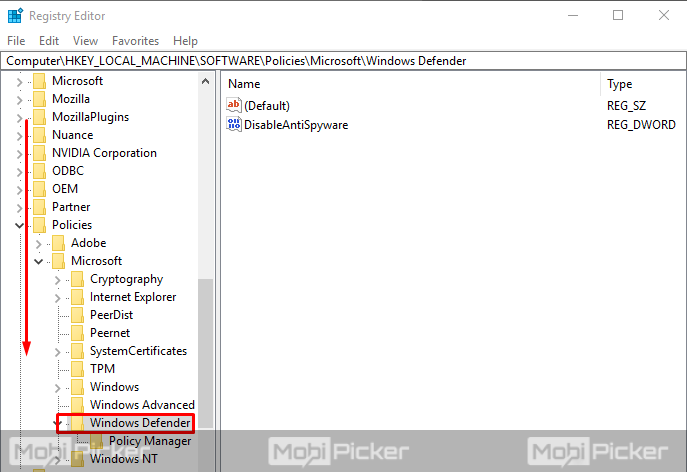
Step 3. Double click on DisableAntiSpyware registry to open the editor. Change the Value data to 1. Click OK.
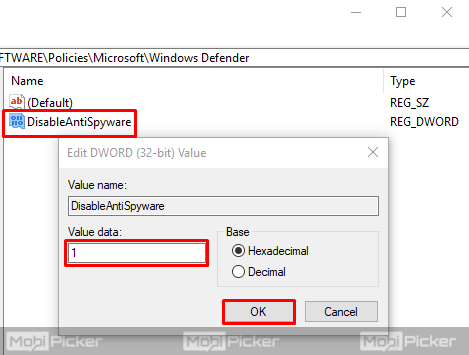
This will turn off the Windows Defender on your computer. Now, you will not be facing any more issues with Antimalware Service Executable.
Conclusion
The addition of Windows Defender Antivirus in Windows 8 and then in Windows 10 was a great boon for Windows users. It meant that we won’t have to install a separate antivirus software, which slows down our computer. But a process of Windows Defender is causing problems and it’s also slowing down our system. Fixing the Antimalware Service Executable high CPU usage problem is very important for smooth functioning of our PC. Hope we were able to help you do that. If you have any questions, do hit us in comments.
The post How to Fix Antimalware Service Executable (MsMpEng.exe) High CPU Usage appeared first on MobiPicker.
(221)

