How to Fix ‘Windows was unable to complete the format’ Error
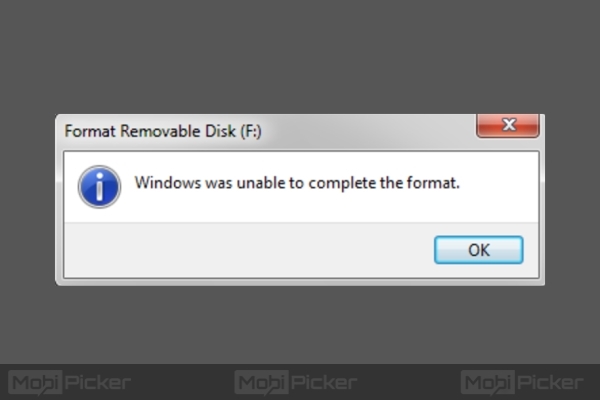
Why Windows was Unable to Complete the Format?
There could be multiple reasons why Windows is showing this annoying message. The most common four reasons are as follows –
1. USB Drive infected with malware/virus
Whenever your USB or external hard disk is infected with a virus, chances are that the virus has actually corrupted the disk file system, preventing the OS from formatting the disk. If you don’t want to run into this problem again, make sure your USB drive and hard disk stay free from virus and other malware.
2. Enabled Write-protection
If the external hard drive / SD Card you are trying to format is ‘Write protected,’ then it explicitly prevents Windows from formatting the disk.
3. Damaged sectors
Whenever a sector on the media storage device is damaged, it prevents Windows from formatting the storage device. Files that are stored on USB drive or hard disk usually occupy sectors that are not continuous. Bad/damaged sectors cannot be written to and Windows complains about this with the annoying message – Windows was unable to complete the format.
4. Physical damage
If your USB drive or hard disk has suffered physical damage, chances are Windows will never be able to use the device. Sometimes, when you drop your hard disk down, the impact damages the circuitry inside. This can lead to improper functioning.
Now that we understand the reasons why Windows fails to format your USB drive or hard disk, let’s take a look at the solutions that will help you resolve this issue once and for all!
How to fix Windows was Unable to Complete the Format
Unless your USB drive is damaged physically to a very bad extent, the solutions that are presented here should help you format your USB drive or hard disk without any issues. The first thing that you should try is formatting using Disk Management.
Note: We are using Windows 10 to perform these methods. However, these methods also work on other Windows versions including Windows 7 and Windows 8.
1. How to Format Hard Drive Using Disk Management
If the traditional formatting method fails with Windows displaying error “Windows was unable to complete the format“, then disk management can help you to format the disk successfully. Disk Management comes as part of Windows by default and helps you create a new volume, delete or format disk partitions, change drive letters and so on. What we are interested in is the format capability of Windows Disk Management system. To use this feature, follow these steps –
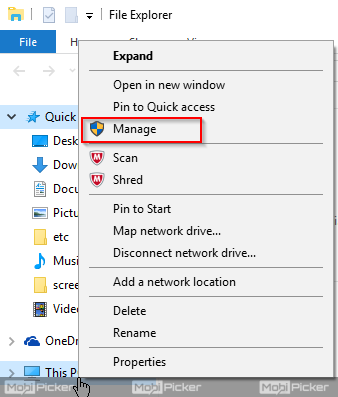
Step 1: Right click on This PC (Windows 10) or My Computer (older versions of Windows) and select ‘Manage‘.
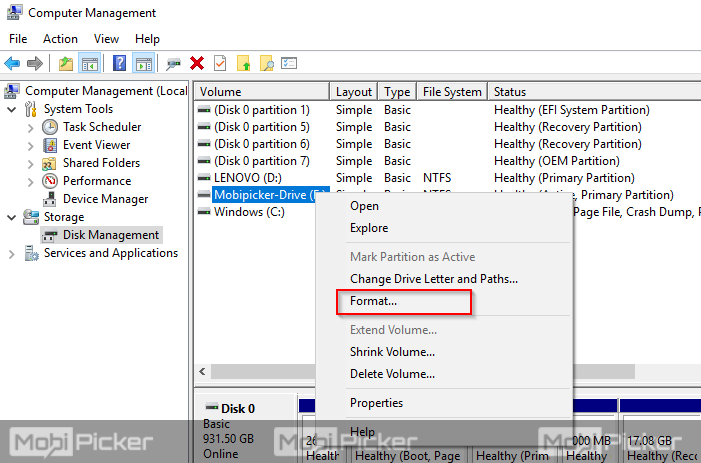
Step 2: In the Next Window, select Disk Management. Then right click the external hard drive / pendrive that you want to format. Click “Format”
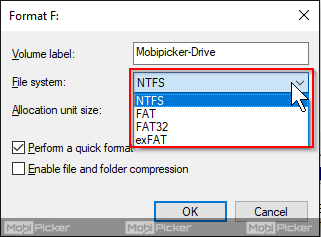
Step 3: Select the file system in next window, and click OK.
When the process is complete, you will see that the drive has been successfully formatted. If this doesn’t fix the issue, try Method 2.
2. How to Clean and Format Hard Drive Using DiskPart
Sometimes, command prompt can be used to solve annoying issues. But this requires a basic understanding of command prompt usage. If you are not familiar with command prompt, we advise you to proceed with caution.
Step 1: Open Command Prompt as an administrator. You can search “Cmd” in search bar and then right click “Command Prompt” and select “Run as an administrator.”
Step 2: In the command prompt copy paste the command given below and press Enter. [Ref. Image 1]
diskpart
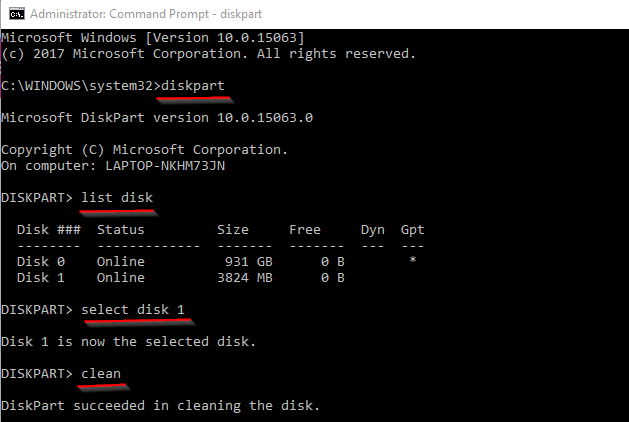
Step 3: Now type the command given below and press Enter. It will show the list of Drives on your PC. [Ref. Image 1]
list disk
Step 4: In next command, we will select the drive which we need to format. It is suggested to cross check the drive before selecting it. A wrong selection could result in important data loss.
If you wish to format the disk named ‘Disk 1’ from the list, type below command and press Enter. [Ref. Image 1]
select disk 1
Step 5: Now your desired drive is selected for clean up and format. To clean the corrupted storage drive, copy paste below command and hit Enter. [Ref. Image 1]
clean
Step 6: After clean the device, we will create the partition on selected drive. Type below command and press Enter. [Ref. Image 2]
create partition primary
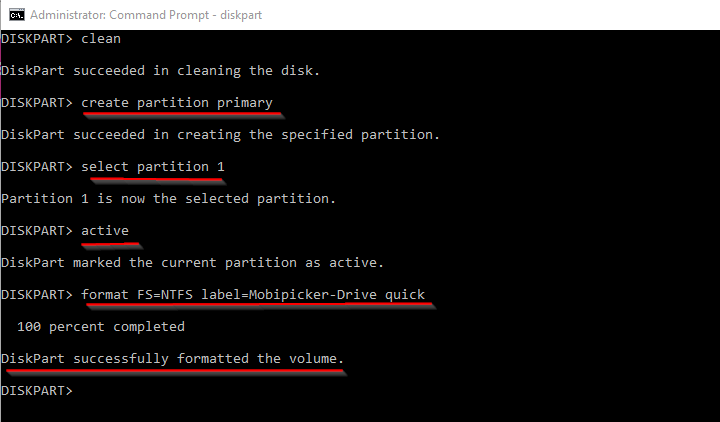
Step 7: We now have created the partition, so in next command, we will select the created partition. Paste the below command and hit Enter. [Ref. Image 2]
select partition 1
Step 8: After selecting the partition, we will mark the partition as active before running the Format command. So type the below command and press Enter key. [Ref. Image 2]
active
Step 9: After marking the drive (your SD Card or Pendrive or other hard drive) as active, we are now ready to format the drive using Diskpart. Copy the below code and paste it in Command Prompt. Then Hit Enter. [Ref. Image 2]
format FS=NTFS label=Mobipicker-Drive quick
This command will format the selected drive. In this command, I have selected the quick format with NTFS file system. Mobipicker-Drive will be the name of drive after format. You can modify it as per your preference.
The post How to Fix ‘Windows was unable to complete the format’ Error appeared first on MobiPicker.
(74)

