How to Increase RAM with Pen Drive in Windows PC (XP / 7 / 8 / 10)
Did you know that you can increase RAM with pen drive in Windows PC? It is not all of us who can afford the high-performance computers such as the MacBook Pro. RAM is an important factor in the performance of a computer. If your computer is sluggish, your RAM can be the main suspect. Fortunately, that pen drive you hardly use can increase your computer’s RAM.

What is RAM?
RAM is the abbreviation for Random Access Memory. It is your computer’s temporary storage. RAM is a narrow chip that can be inserted in the motherboard of a computer. There are several RAM slots in any motherboard.
Why is RAM important?
The very reason you are reading this is because you are finding solutions to improve your RAM. It is fair to assume you understand the importance of RAM, but it does no harm to stress the point. When a program runs on a computer, Windows Explorer stores it in the RAM for easy and instant retrieval. The more programs and files you open, the more you eat up the RAM. In other words, the larger the RAM the better the computer’s performance. 4GB RAM is considered ideal for non-gamers.
How a Pen Drive works as RAM
Are you familiar with the concept of Virtual Memory? Virtual Memory allows the operating system to temporarily store pages of data in disk storage, thus relieving the RAM. Virtual Memory will not perform as good as the RAM itself, but it will increase performance by increasing paging memory. That’s technically how to increase RAM using pen drive.
How to Increase RAM with Pen Drive as RAM
It is now time to focus on the process itself. The process can be performed on Windows XP, 7, 8 and 10. Windows ceased support for older versions, so you would understand why they will not be considered in this post.
Windows XP
On your Windows XP PC follow these steps to use pen drive as RAM:
Step 1: Start your PC.
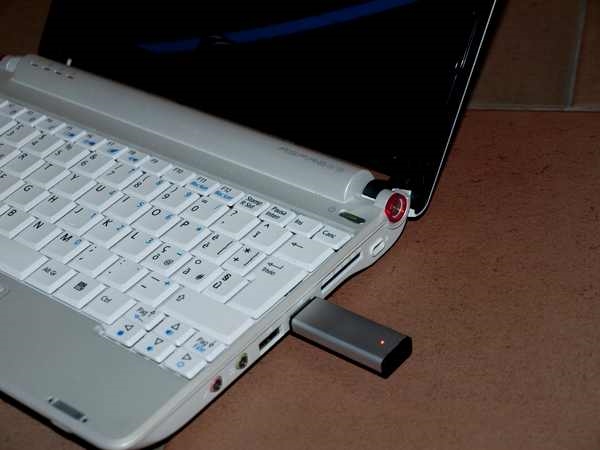
Step 2: Insert the pen drive. Since you intend to use this for some time, insert it in USB ports you hardly use. On a desktop, the USB ports found on the back would be perfect.
Step 3: Open ‘My Computer’ and then click on ‘Properties’.
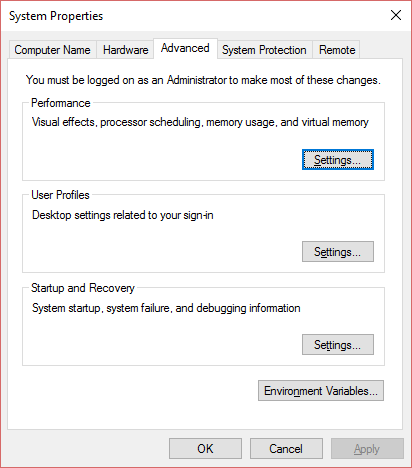
Step 4: Open the ‘Advanced System Settings’ and then open the ‘Advanced’ tab.
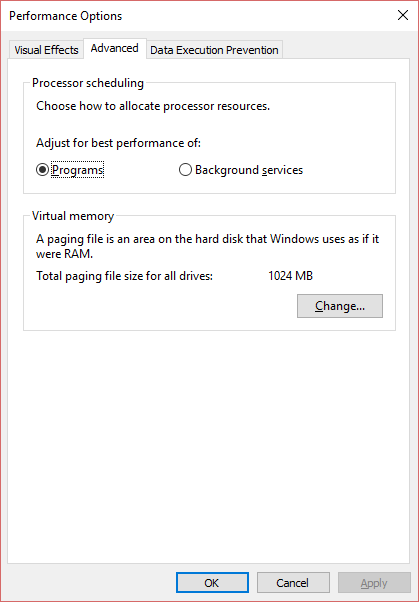
Step 5: From the ‘Advanced Tab’ open ‘Settings’ and click on the ‘Advanced’ tab.

Step 6: Click on ‘Change’, a button that will appear on the bottom right of the window. Uncheck the ‘Automatically Manage Paging’.

Step 7: On the same window, check the pen drive you intend to use as RAM. You will then specify the initial size and maximize size under the ‘Custom Size’. The figures should be the size of your pen drive.
Step 8: Click on ‘Set’ button, after which you will finish the process by clicking on ‘OK’.
For the changes to take effect you will need to restart your computer. Do not unplug the pen drive.
Windows 7, 8, and 10
The procedure used on Windows XP will work on Windows Vista, 7 and 8. But, the process is time-consuming. These later versions of Windows have a service called ‘Ready Boost’, which makes the process of using pen drive as RAM easier.
Step 1: Start your PC.
Step 2: Insert the pen drive. Format the drive if necessary.
Step 3: Open ‘Computer’, or ‘This PC’ depending on the version of windows your PC is running.
Step 4: Right click on the pen drive and open ‘Properties’.
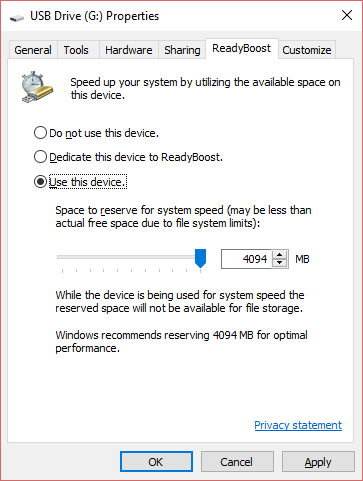
Step 5: On the properties window, open the ‘Ready Boost’ tab. Check ‘Use this device’ and then specify the memory to reserve. Apply these settings.

The ‘Ready Boost’ feature will automatically Cache on the pen drive.
Final words
Now you know how to increase RAM with pen drive in PC. The pen drive has to be more than 2GB for the process to work. This guide has put you one step closer to excellent computer performance. Using pen drive as RAM will boost performance and minimize the chances of your computer ‘hanging’. If you experience any difficulties executing the process, use the comment section to ask questions.
The post How to Increase RAM with Pen Drive in Windows PC (XP / 7 / 8 / 10) appeared first on MobiPicker.
(30)

