How to Take a Screenshot on iPhone X
Are you wondering how take a screenshot on iPhone X? Since the screenshot feature was made available on iPhones (iOS 2.0), Apple has always used the same method for it. You just had to press the Power/wake button and the Home button to take a screenshot. But now, Apple has changed their conventional method of taking a screenshot. In iPhone X, you cannot take a screenshot the old way. Then how do we take a screenshot on iPhone X?
iPhone X is the latest device released by Apple, and they have made some changes to it from the last iPhone. They have changed the entire design of the iPhone which includes all screen on the front, and many more changes. But, the first thing which you will notice is that there is no Home button on it. The earlier method to take a screenshot included the use of Home button. So, as it is no longer available in the latest iPhone X, there must be some new way to take a screenshot. Right? Well, of course, there is.
Contents
How to Take a Screenshot on iPhone X
With the Home button gone, there are still two ways to take a screenshot on iPhone X. Follow the methods as given below.
1. Side Button + Volume Up
The new way to take a screenshot on iPhone X is by using the newly introduced Side button and the Volume Up button. Here’s how to take a screenshot using these buttons.
Step 1. Open the application or content you want to capture in a screenshot.
Step 2. Press and hold the Side button. It is located on the right side of your iPhone X. For older iPhones on iOS 11, it is the Sleep/Wake button.
Step 3. Now, press the Volume Up button and release it immediately.
2. AssistiveTouch
The new combination is a little awkward and may take some time to get used to it. Also, some might not get used to it as holding the buttons for too long can lead to different features. So, if you want, there is another way to take a screenshot on iPhone X by enabling triple click accessibility shortcuts gesture and using AssistiveTouch.
If you want to use AssistiveTouch for taking Screenshots only, you can use the on-screen tool. To do so, follow these steps.
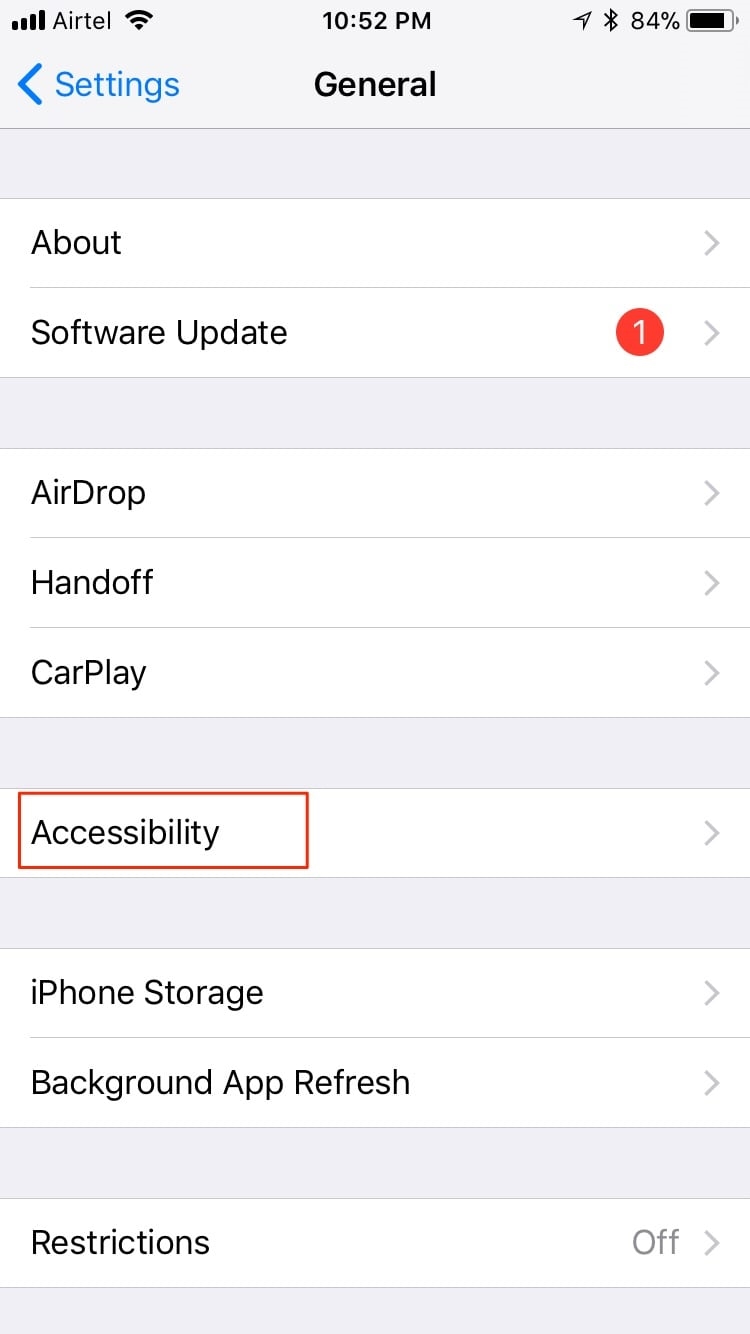
Step 1. Go to Settings and tap on General.
Step 2. Tap on Accessibility.
Step 3. Go to Accessibility Shortcut.
Step 4. Mark only AssistiveTouch.
Step 5. Go back to Accessibility and select AssistiveTouch.
Step 6. Select the way you want to take a screenshot. The best one is to change Single-Tap or Double-Tap to Screenshot. You can also set Double-Tap to Open Menu so that you can still have access to the main AssistiveTouch menu.
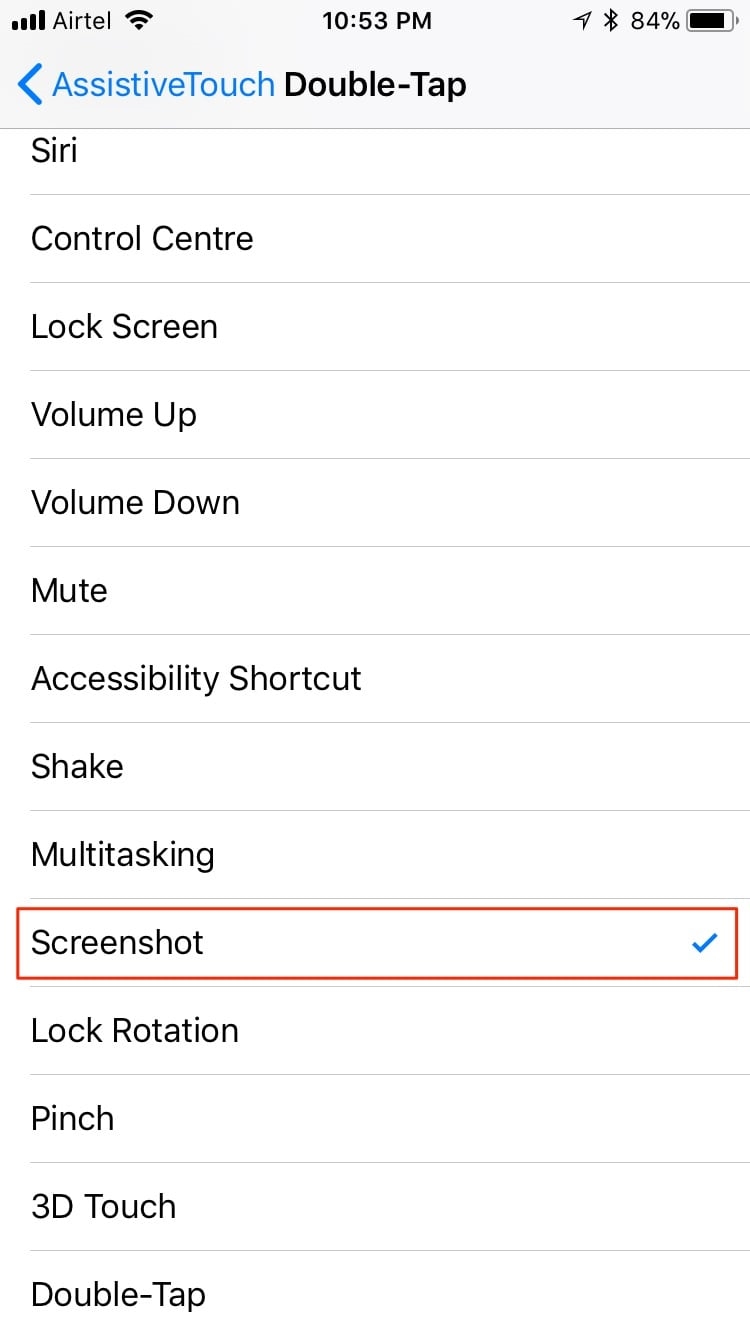
Step 7. Now, you can take a screenshot this way:
- Press the side button three times. (Triple-click)
- A grey Home button icon will appear on the screen. Tap on it once and the screenshot will be taken. The button will not appear in the screenshot.
After taking a screenshot, the screen of your iPhone X will flash, which is a confirmation that the screenshot is captured. The screenshot will minimize towards the lower left side of your screen, and you will see a thumbnail of it. This thumbnail will stay on your screen for 5 seconds before disappearing. To remove it even quicker, you will have to slide it towards the right.
Screenshot Features on iPhone X
Yes, that’s not it. The screenshot feature in iPhone X has a lot more to offer. There are more changes in this section. After taking a screenshot, you can do many different things, right from the little thumbnail on the left.
Sharing a screenshot with someone, transferring it to a computer, posting it on Social Media etc. on iPhone X is a lot easier than earlier. You just need to Press and Hold the little thumbnail icon, and it will bring up the sharing options. From here, you can transfer screenshot to AirDrop, text it, mail it, and do many more things with it.
2. Edit Screenshot on iPhone X
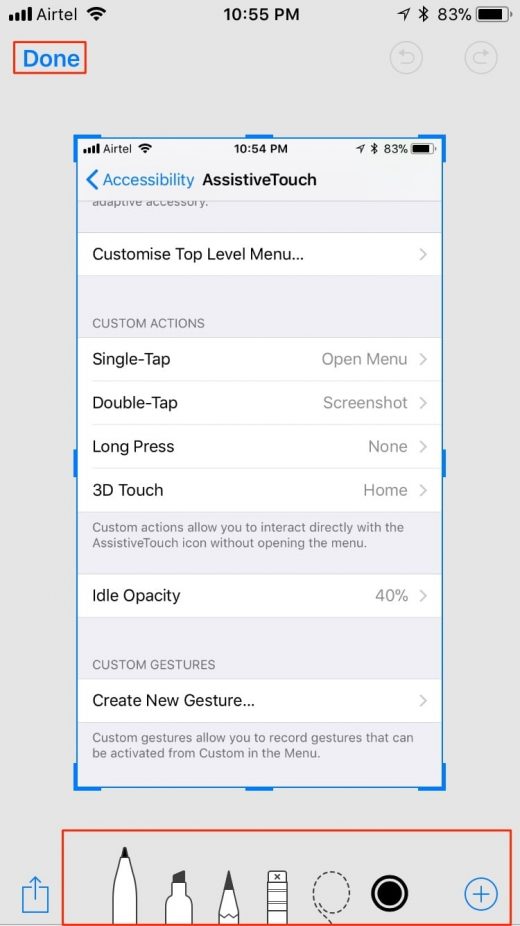
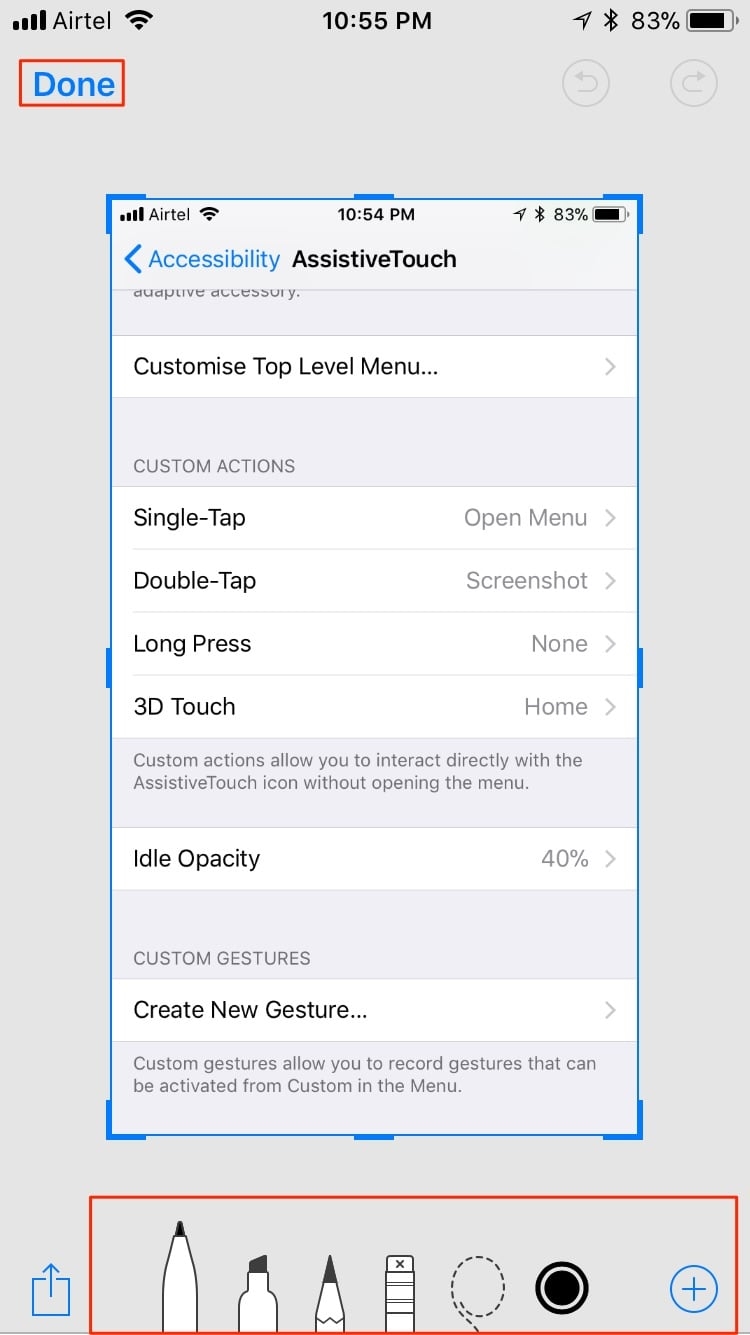
If you want to edit the screenshot right away after taking it, you can do it very easily in iPhone X. Just tap on the little thumbnail, and the Markup window will open up with your screenshot. The Markup window is very similar to the Markup tool in Photos. Here you can do all kinds of editing stuff. From adding text or signature, marking, fixing, creating doodles, moving doodles, undo, redo, crop, zoom etc. After doing all the editing stuff, you can share it from here as well. Just tap on the share icon at the bottom left and you can then select from any of the multiple sharing options.
3. Save or Delete Screenshot
If you didn’t go to the Markup window to edit the screenshot or the screenshot just vanished after 5 seconds, or you just swiped it, the screenshot will be saved automatically. You can then find it in the Screenshots album in Photos app. But, if you did edit the screenshot, then you need to tap on Done, and then you can select to Save or Delete the edited screenshot from here.
4. Take and Edit Multiple Screenshot (At once)
This is one of the best features of this new screenshot tool in iPhone X. You can take multiple screenshots in a row, and you can edit them as well, all at the same time. There is no need to wait for the screenshot thumbnail to go away, as it won’t be visible in the next screenshot. Just take screenshots one by one, and they will be stacked on top of each other in the thumbnail area. When you are done, just tap on the thumbnail group and you can edit them all at the same time in the Markup window. You just need to swipe left/right to edit different screenshots. If you want to draw something on two or more images, just drag and drop it on different screenshots.
Taking screenshots is very easy on iPhone X. But, with new features added to share and edit them, it has become a lot more useful. The Screenshot feature has really become more productive on iPhone X. All these features are also available on other iPhone’s running on iOS 11. We hope we were able to help you learn and explore the screenshot feature on iPhone X. If you have any questions, please mention them below in comments.
Check Also: How to turn off iPhone X
The post How to Take a Screenshot on iPhone X appeared first on MobiPicker.
(58)

