What is the Google Merchant Center?
Google Merchant Center is a platform for retail brands to create and manage product ads in Google Ads. Instead of relying on text ads to promote your items, Google Merchant Center allows you to create visual product ads that entice consumers to browse and click.
Google Shopping ads generate significantly higher click-through rates than regular text ads, generating 85.3% of all retail clicks via Google as of 2018. In other words, if you’re selling consumer products, you want to be promoting them with shopping ads but, first, you need to get familiar with Google Merchant Center.
What is Google Merchant Center?
Google Merchant Center is a platform where you can store and manage information about the products you sell. What you’re going to do is create and upload a product feed with all the relevant information about your items (images, descriptions, prices, etc).
Merchant Center is simply a place to upload, store and manage this data.
More importantly, this product feed allows you to start creating shopping campaigns and other wonderful stuff in Google Ads. This is where you can start leveraging Google Shopping ads and enjoying those impressive click-through rates.
Google Shopping campaigns
The first thing Merchant Center allows you to do in Google Ads is create Shopping campaigns. So, when someone searches for the kind of products you’re selling, you can bid to appear in the Google Shopping feed.
Retailers using Google Shopping campaigns report increased visibility, higher CTRs and improved KPIs where it matters most: sales, revenue and profit.
Local inventory ads
Your Merchant Center data can also be used to promote products you sell offline and increase in-store visits. By using local inventory ads, you can reach people searching in your local area and show them you have the product they’re looking for, in stock and ready to buy.
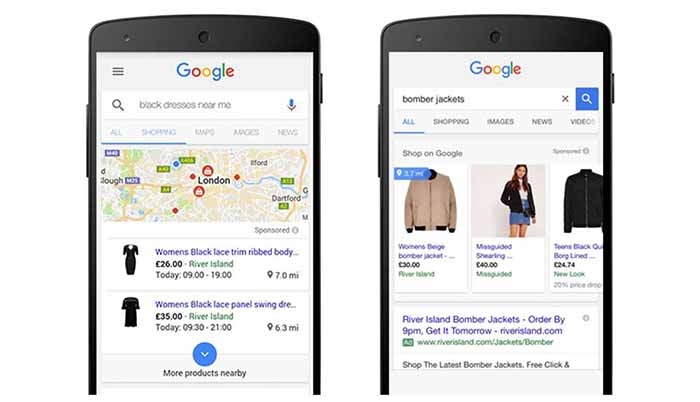
This is a big deal for bricks-and-mortar stores selling products people want to try on or see before they buy (clothes, furniture, TVs, etc.). Local inventory ads are also a powerful tool when people need to buy something in a hurry – like before the shops close for Christmas or a last-minute Valentine’s Day gift on the way back from work.
How to set up Google Merchant Center
First, head over to the Google Merchant Center website and create your account. Simply sign up and follow the prompts to enter your business information (website, business location, etc.).
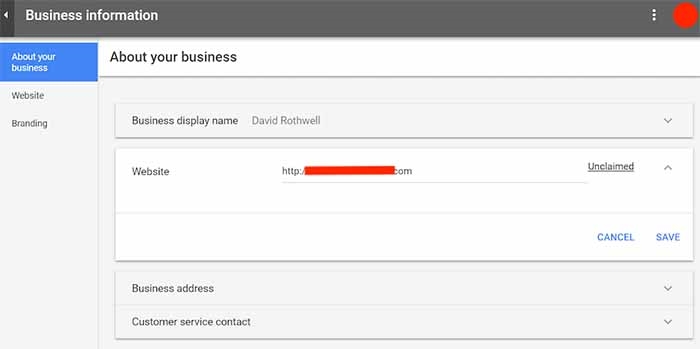
Finally, you will be asked to verify your website and you’ll be given four options for this. You can upload an HTML file to your website, verify through Google Analytics, add an HTML tag to your site or verify using Google Tag Manager. You’ll be guided through whichever option you choose.
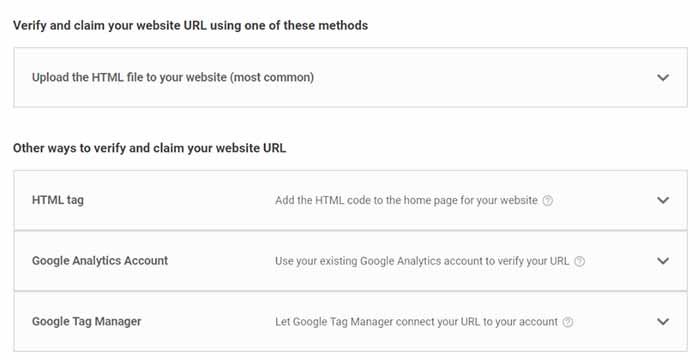
Once you’re set up and verified, the real work can begin: creating your data feed.
Create your data feed
With your Merchant Center account set up, you’ll be prompted to upload your product data, which the platform calls a “data feed”. Before you do this, you’ll need to actually create a product feed.
There are numerous ways you can do this, however, we recommend using the Google Sheet template provides in Merchant Center.

This gives you full control over your data feed and makes it easier to manually fix any errors.
In the Google Sheets doc, each row represents a different product and you’ll need to enter attributes in the relevant columns. Make sure you don’t delete or change any of the column headers. Just delete the example product info and place your own data in the relevant cells.
Are there any other ways to create a feed?
Some eCommerce platforms like Shopify and BigCommerce have dedicated features for creating and exporting data feeds to Merchant Center. These are generally good alternatives to manually creating your own product feed and regularly updated.
Likewise, open-source platforms like WooCommerce and OpenCart have plugins available that can do this for you but the quality of these can vary greatly and there’s no guarantee they’ll continue to be updated or supported as Merchant Center evolves.
What information do I need to enter in my Google Merchant Center feed?
For each product in your data feed, you’ll need to define the following attributes in the correct format. You can find details on the official Google documentation, but here’s a quick summary of what you’ll need to include:
- ID: A unique alphanumerical code that can be used to identify each individual product.
- Title: The headline users see in your product listings, which should include the product name, type and descriptive qualities (you’ve only got 150 characters, though).
- Description: A full product description of up to 5,000 words to provide Google and users with more relevant information.
- Availability: The current availability status of the product.
- Price: The price of each product, which should be entered in numeric values (Google will automatically convert them into the currency for the location you’re targeting – eg: 100 -> 100 GBP).
- Link: The URL link to the relevant product or landing page.
- Image link: The URL for the main image you want to show in your listing.
- GTIN/MTN: If you’re selling products bought from a third-party manufacturer, you’ll need to include the Global Trade Item Number (GTIN). Some items won’t have a GTIN, especially parts used to manufacture items, in which case you’ll need to provide a Manufacturer Part Number (MPN).
In cases where there are no GTIN or MTN available for your products (eg: handcrafted items from natural materials), skip the GTIN and MPN columns and simply type “no” into the indentifier_exists column.
Upload your feed to Google Merchant Center
With your data feed complete, you’re now ready to upload it to Merchant Center. Log in to GMC, click on the Products tab in the left-side menu and then click on the Feeds link in the following drop-down menu.
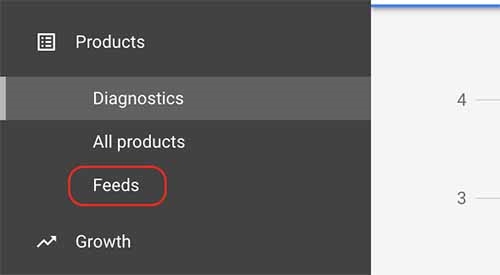
Then, click on the blue + button to upload a new feed and follow the instructions that pop up on-screen. You’ll be asked to define your country of sale and language on the first prompt. In Google Merchant Center, a target country defines which country people will be able to see your product listings in search.
If you want to sell in multiple locations, you have to upload a separate feed for each location and language setting.
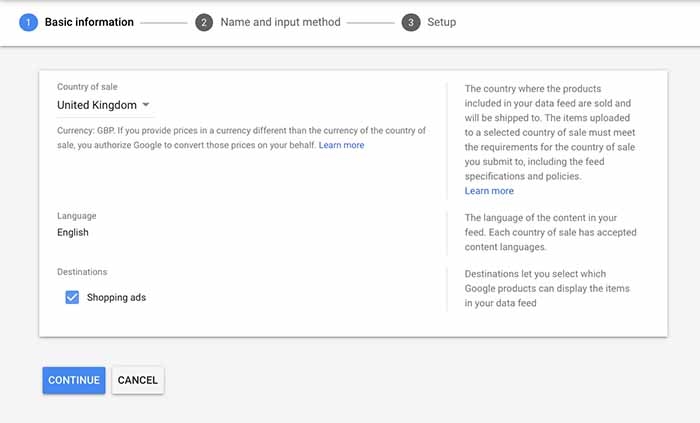
On the next screen, you’ll be asked to name your feed and choose which format to submit it. By default, the Google Sheets option is selected (recommended) so you can click Continue and, on the next screen upload your spreadsheet.
What do I need to do next?
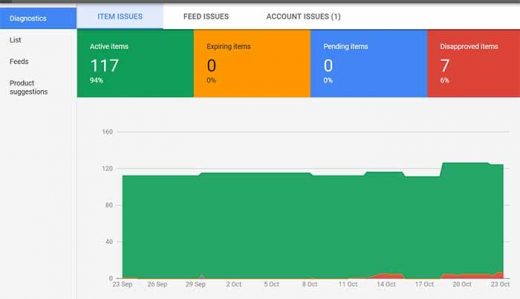
Once your data feed is uploaded to Merchant Center, the first thing you’ll need to do is check the status of your products in the Diagnostics dashboard.
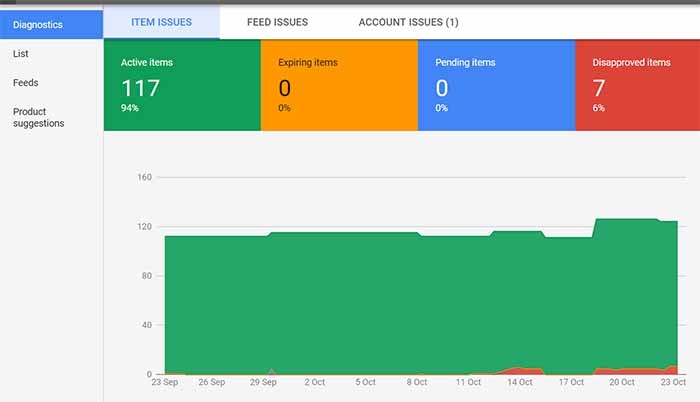
This is where you’ll see any issues with your feed, which will show as warnings and disapprovals. The dashboard will help you identify the cause of any problems, which could include anything from missing data and policy violations to missing mobile landing pages.
Next, you’ll want to link Merchant Center to Google Ads by following the instructions on this page.
Finally, you’ll want to make sure you update your feed regularly to ensure all of your data remains up to date. Products in GMC expire after 30 days, so this is the minimum requirement or updating your feed. However, many retailers update their feeds on a daily basis or even more frequently if stock statuses and prices change rapidly.
Getting your Google Merchant Center account up and running correctly can take a bit of work and the same could be said for managing your feeds. However, the performance of Google Shopping campaigns and the ability of local inventory ads to generate in-store visits makes the workload more than worth it.
Digital & Social Articles on Business 2 Community
(113)

